Data Sources
The Data Source section allows administrators to define where they would like to pull information from to use throughout the LocalMaps admin. Data sources can be used to configure various components such as reports, searches, and feature queries. Once these are created, they can then be added to a specific map, allowing end users to have a tailored experience with each viewer.
Data Sources can be layers from your ArcGIS Online Organization or ArcGIS Enterprise. Alternatively, LocalMaps data-level integration allows administrators to read non-spatial information directly from SQL Server, MySQL, PostGres, and Oracle Databases.
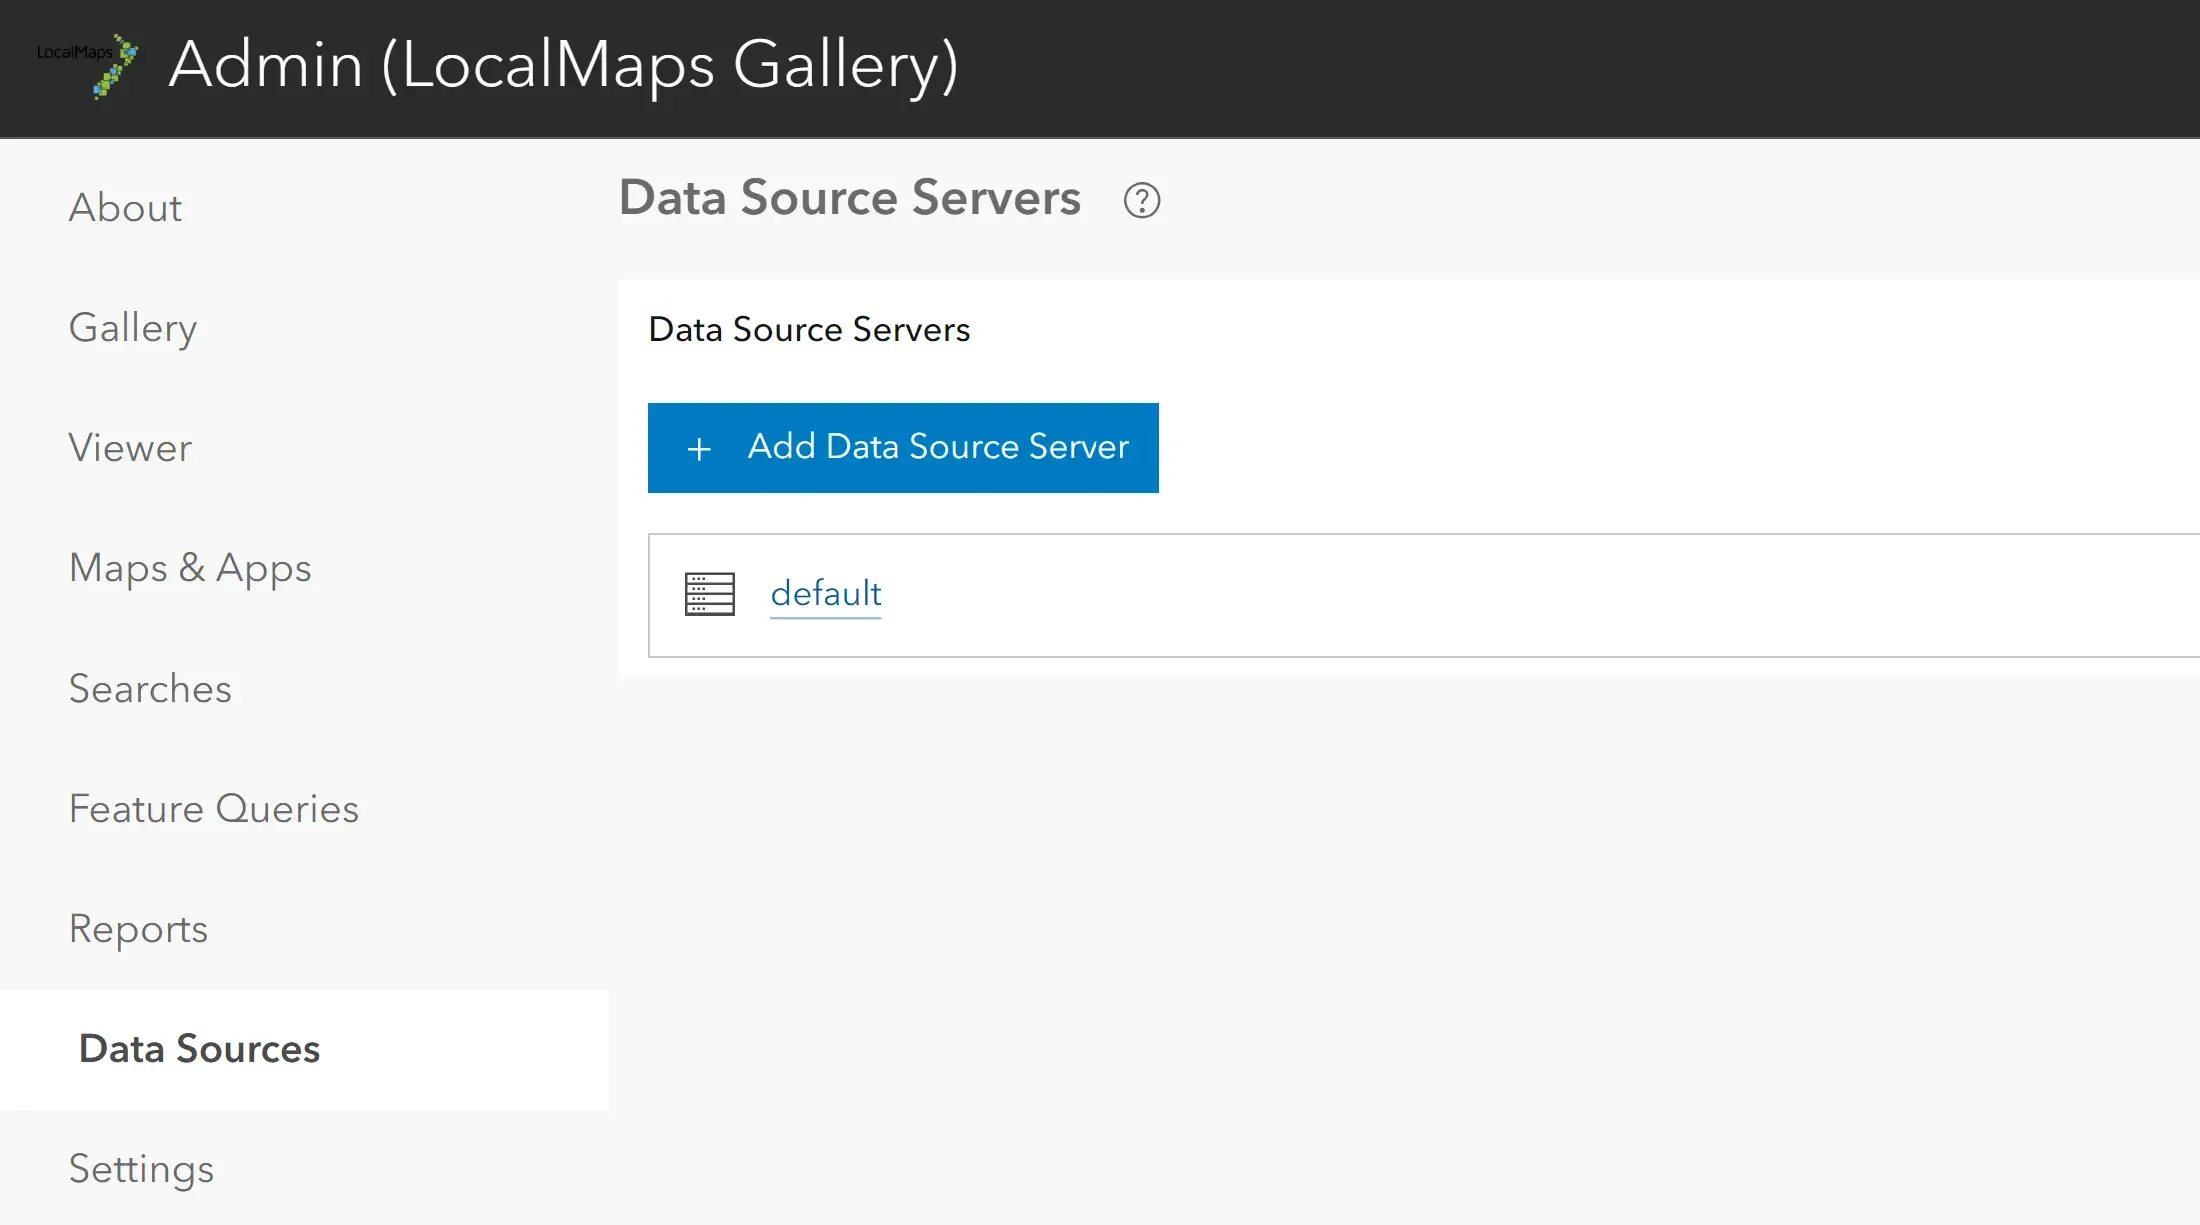
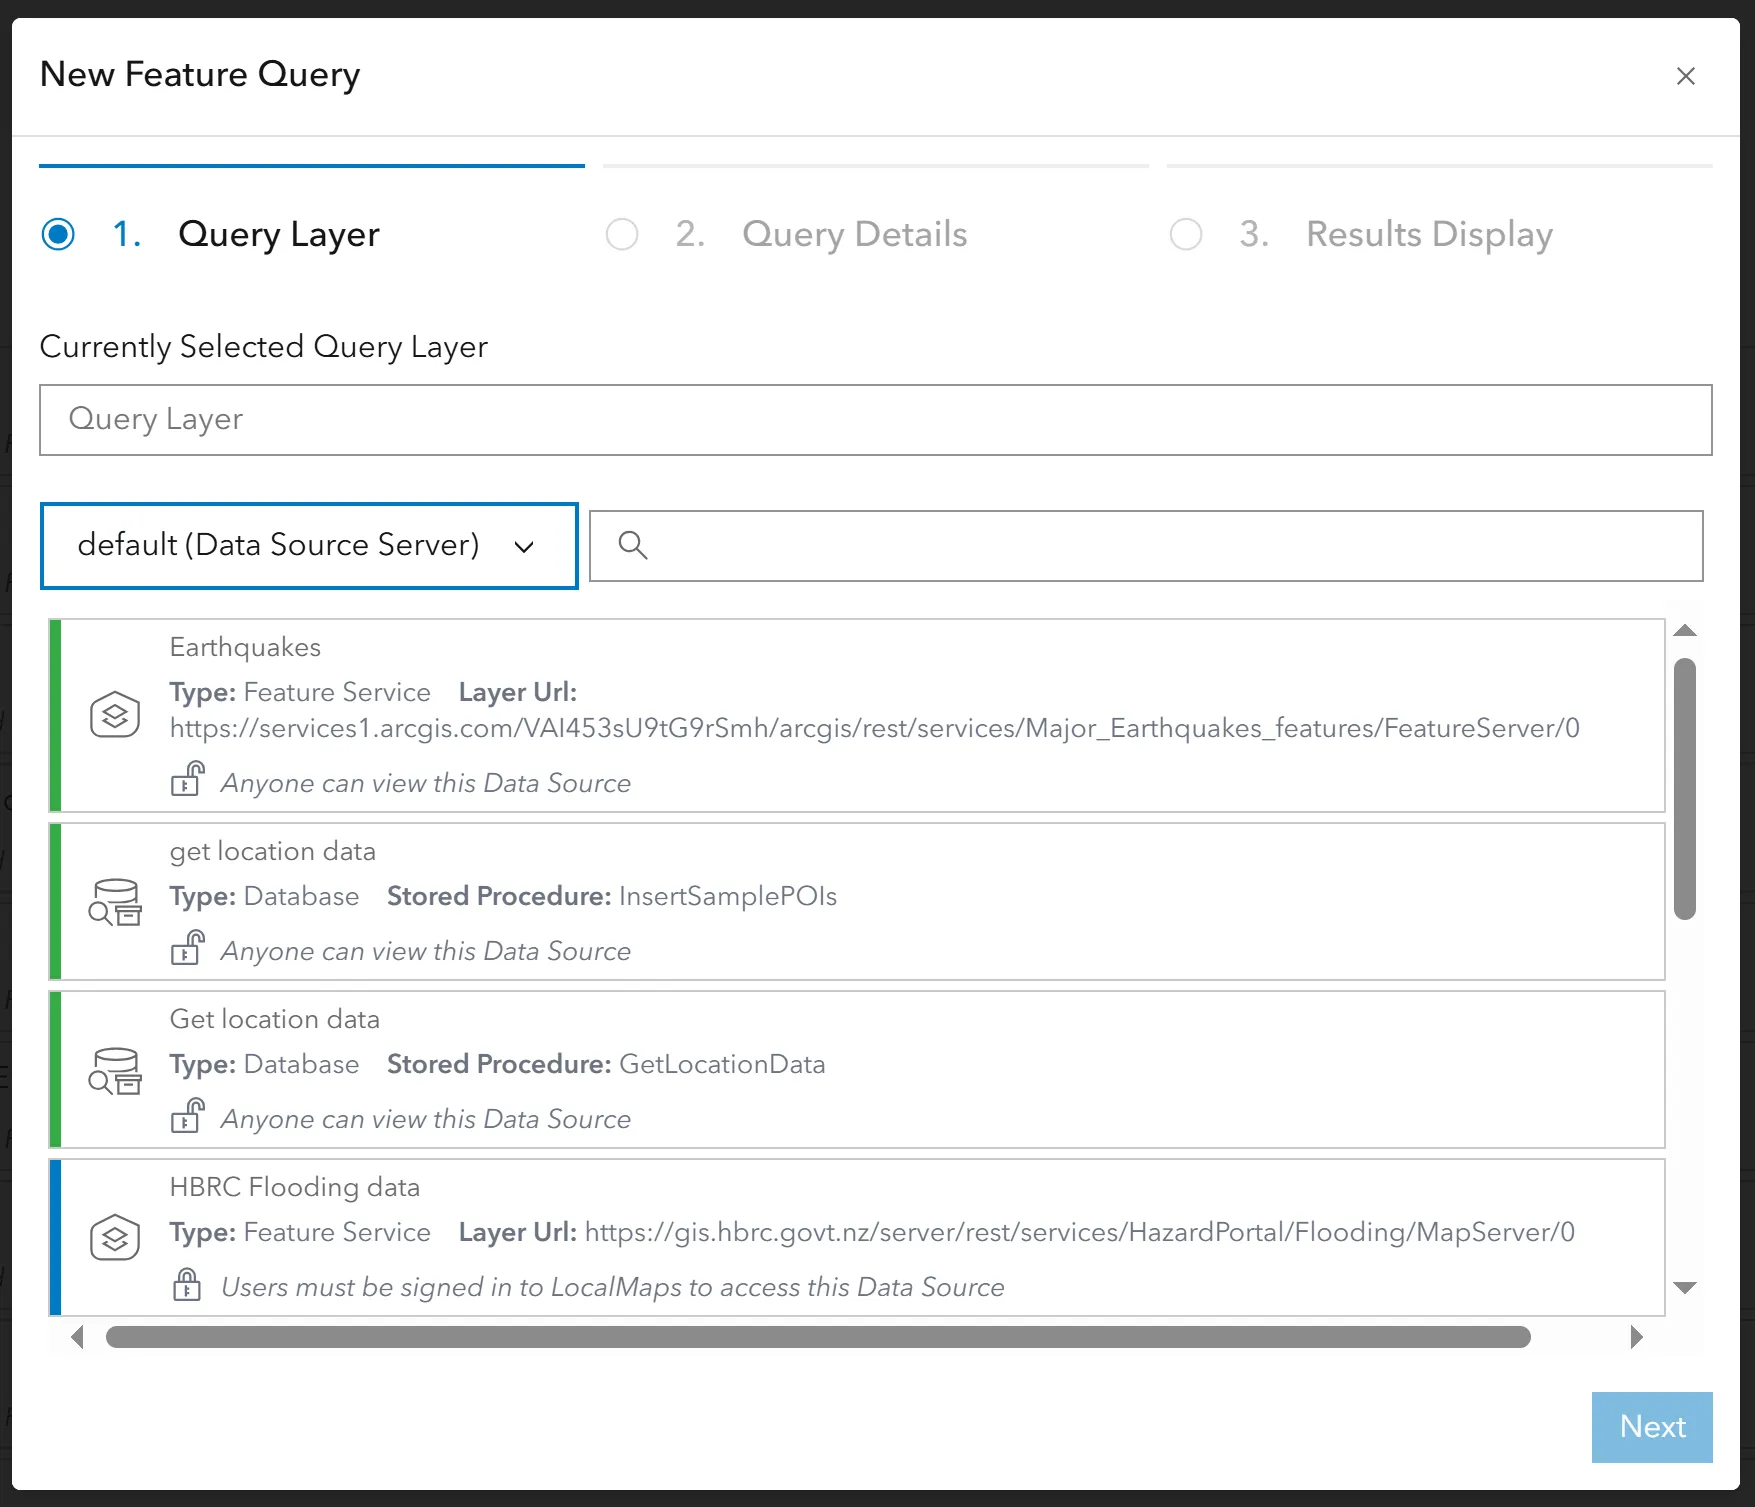
As shown in the image below, your LocalMaps installation will come preconfigured with a default data source server set up. Click on the default server to set up data sources. Please note the ability to add multiple data source servers is not currently supported.
Version 3.1
ArcGIS Online or Enterprise Data Sources
- Click the Data Sources tab in the Admin panel.
- Click on the existing data source server.
- Under Data Provider, click Add New Data Provider.
- Provider Type: Select ArcGIS.
- Name: A name for the data provider.
- Portal/Online URL: Enter the URL along with administration Username and Password.
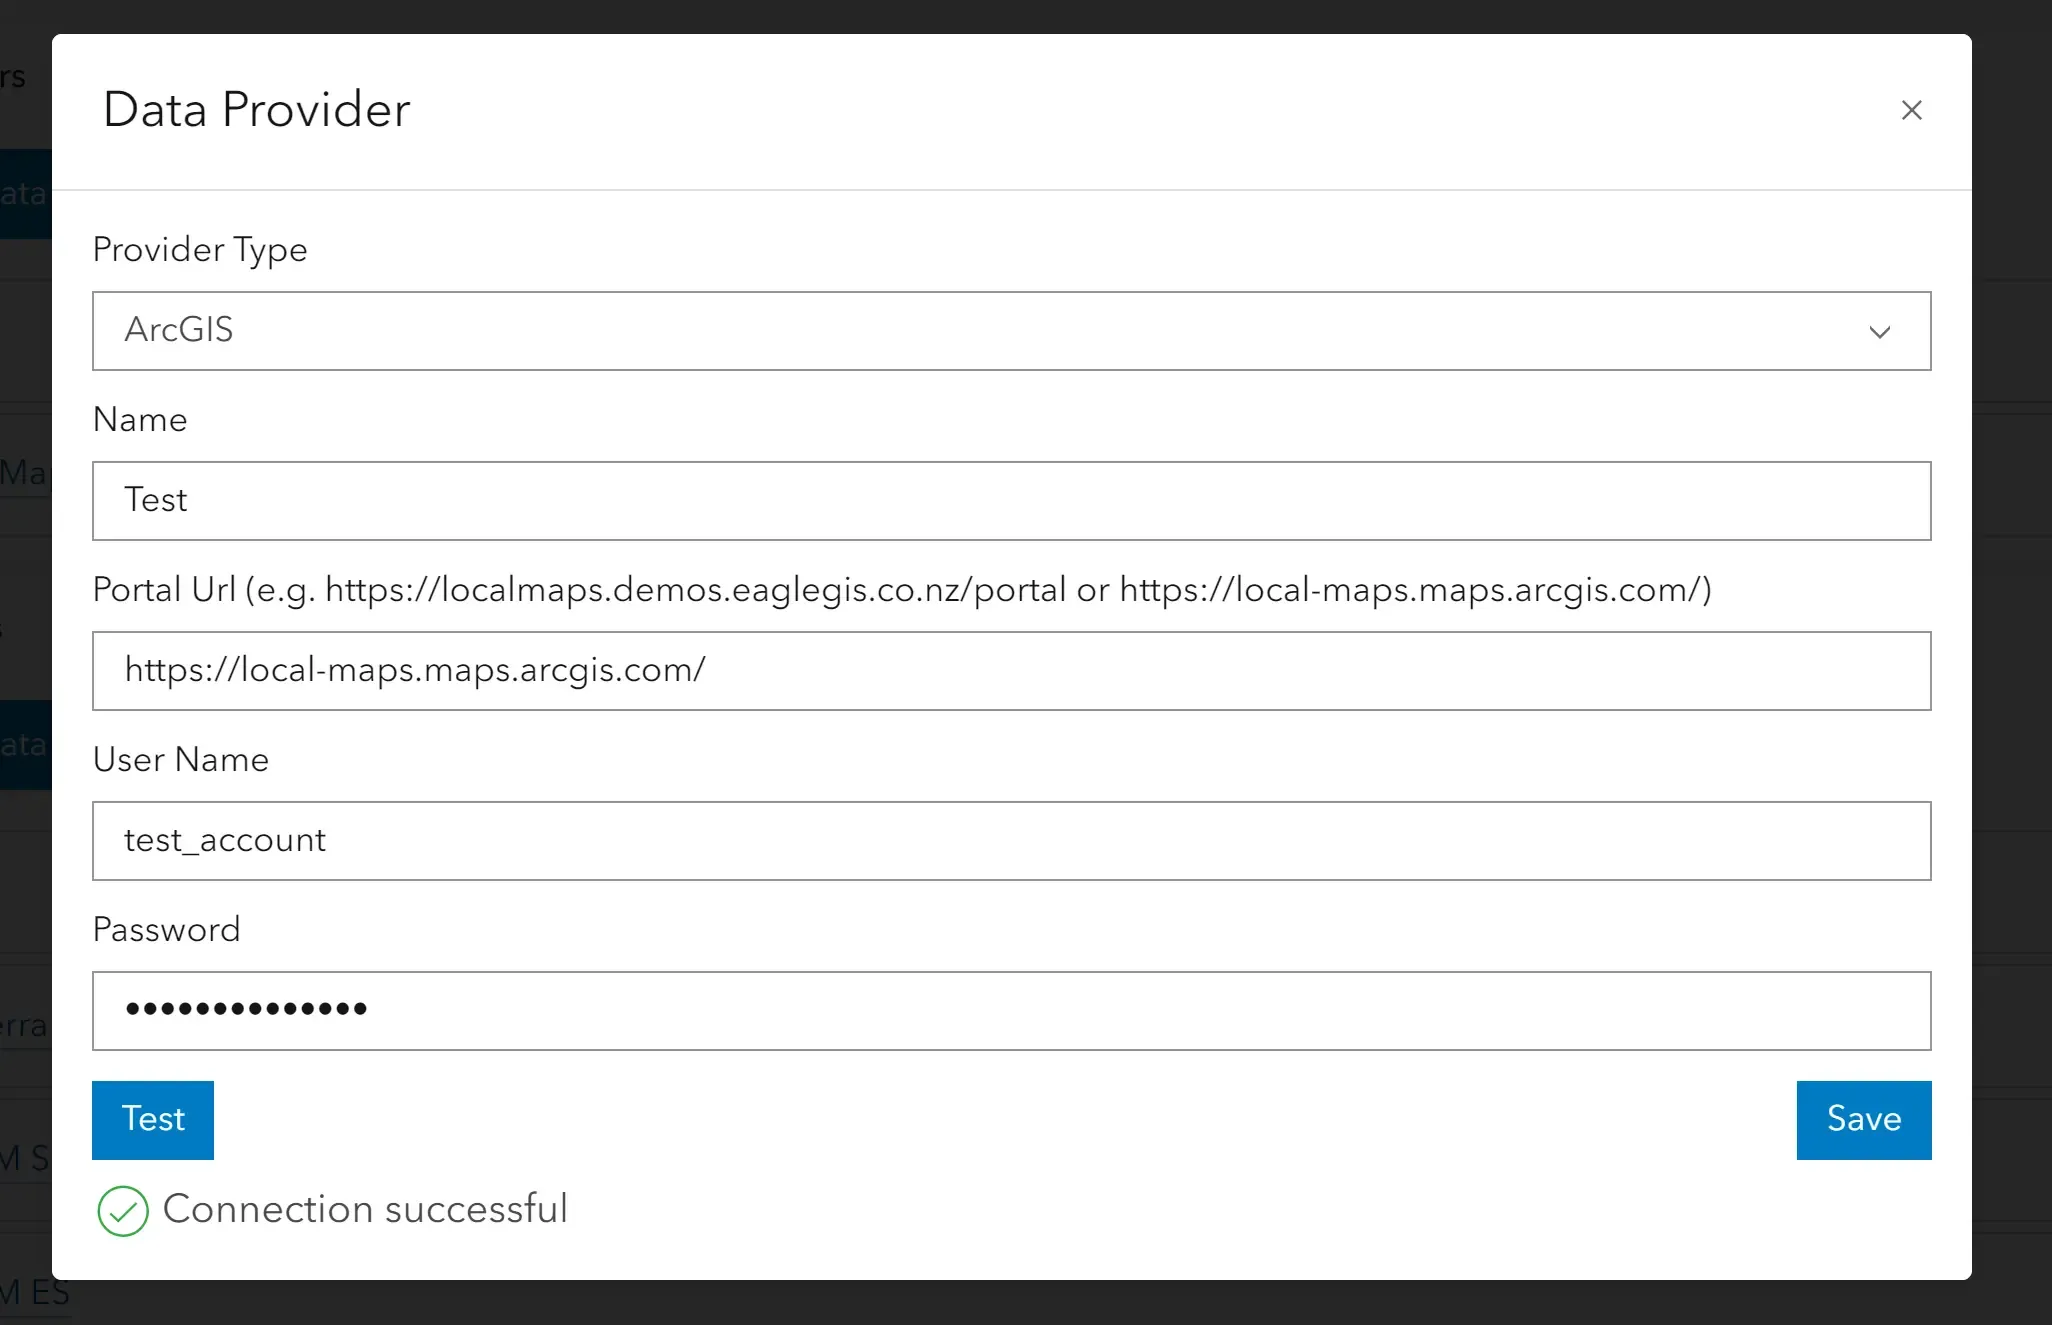 You can then test if the Service is valid by hitting the Test button. If the service is valid, a green tick will appear. If invalid, a red cross will appear and prevent the administrator from saving the service until corrected.
- Click Save.
Database Data Sources
Data sources can be set up to read information directly from SQL Server, MySQL, PostGres, or Oracle databases. By leveraging LocalMaps Data level integration, you can consume and display related information directly within a layer’s popup, removing the need to write complex views or overnight processes.
- To add a new database, go to the database tab and click New Data Provider.
- Select your database from the provider type dropdown.
- Name: A name for the menu.
- Server: Database server name (or IP address).
- Port: Port that the database server is running on (enter only if applicable).
- Enable SSL: For PostGres or MySQL databases. If your database has SSL Support, tick the “Enable SSL” checkbox.
- Database: Name of your Database.
- User Name: User to connect to database.
- Password: Password to connect to database.
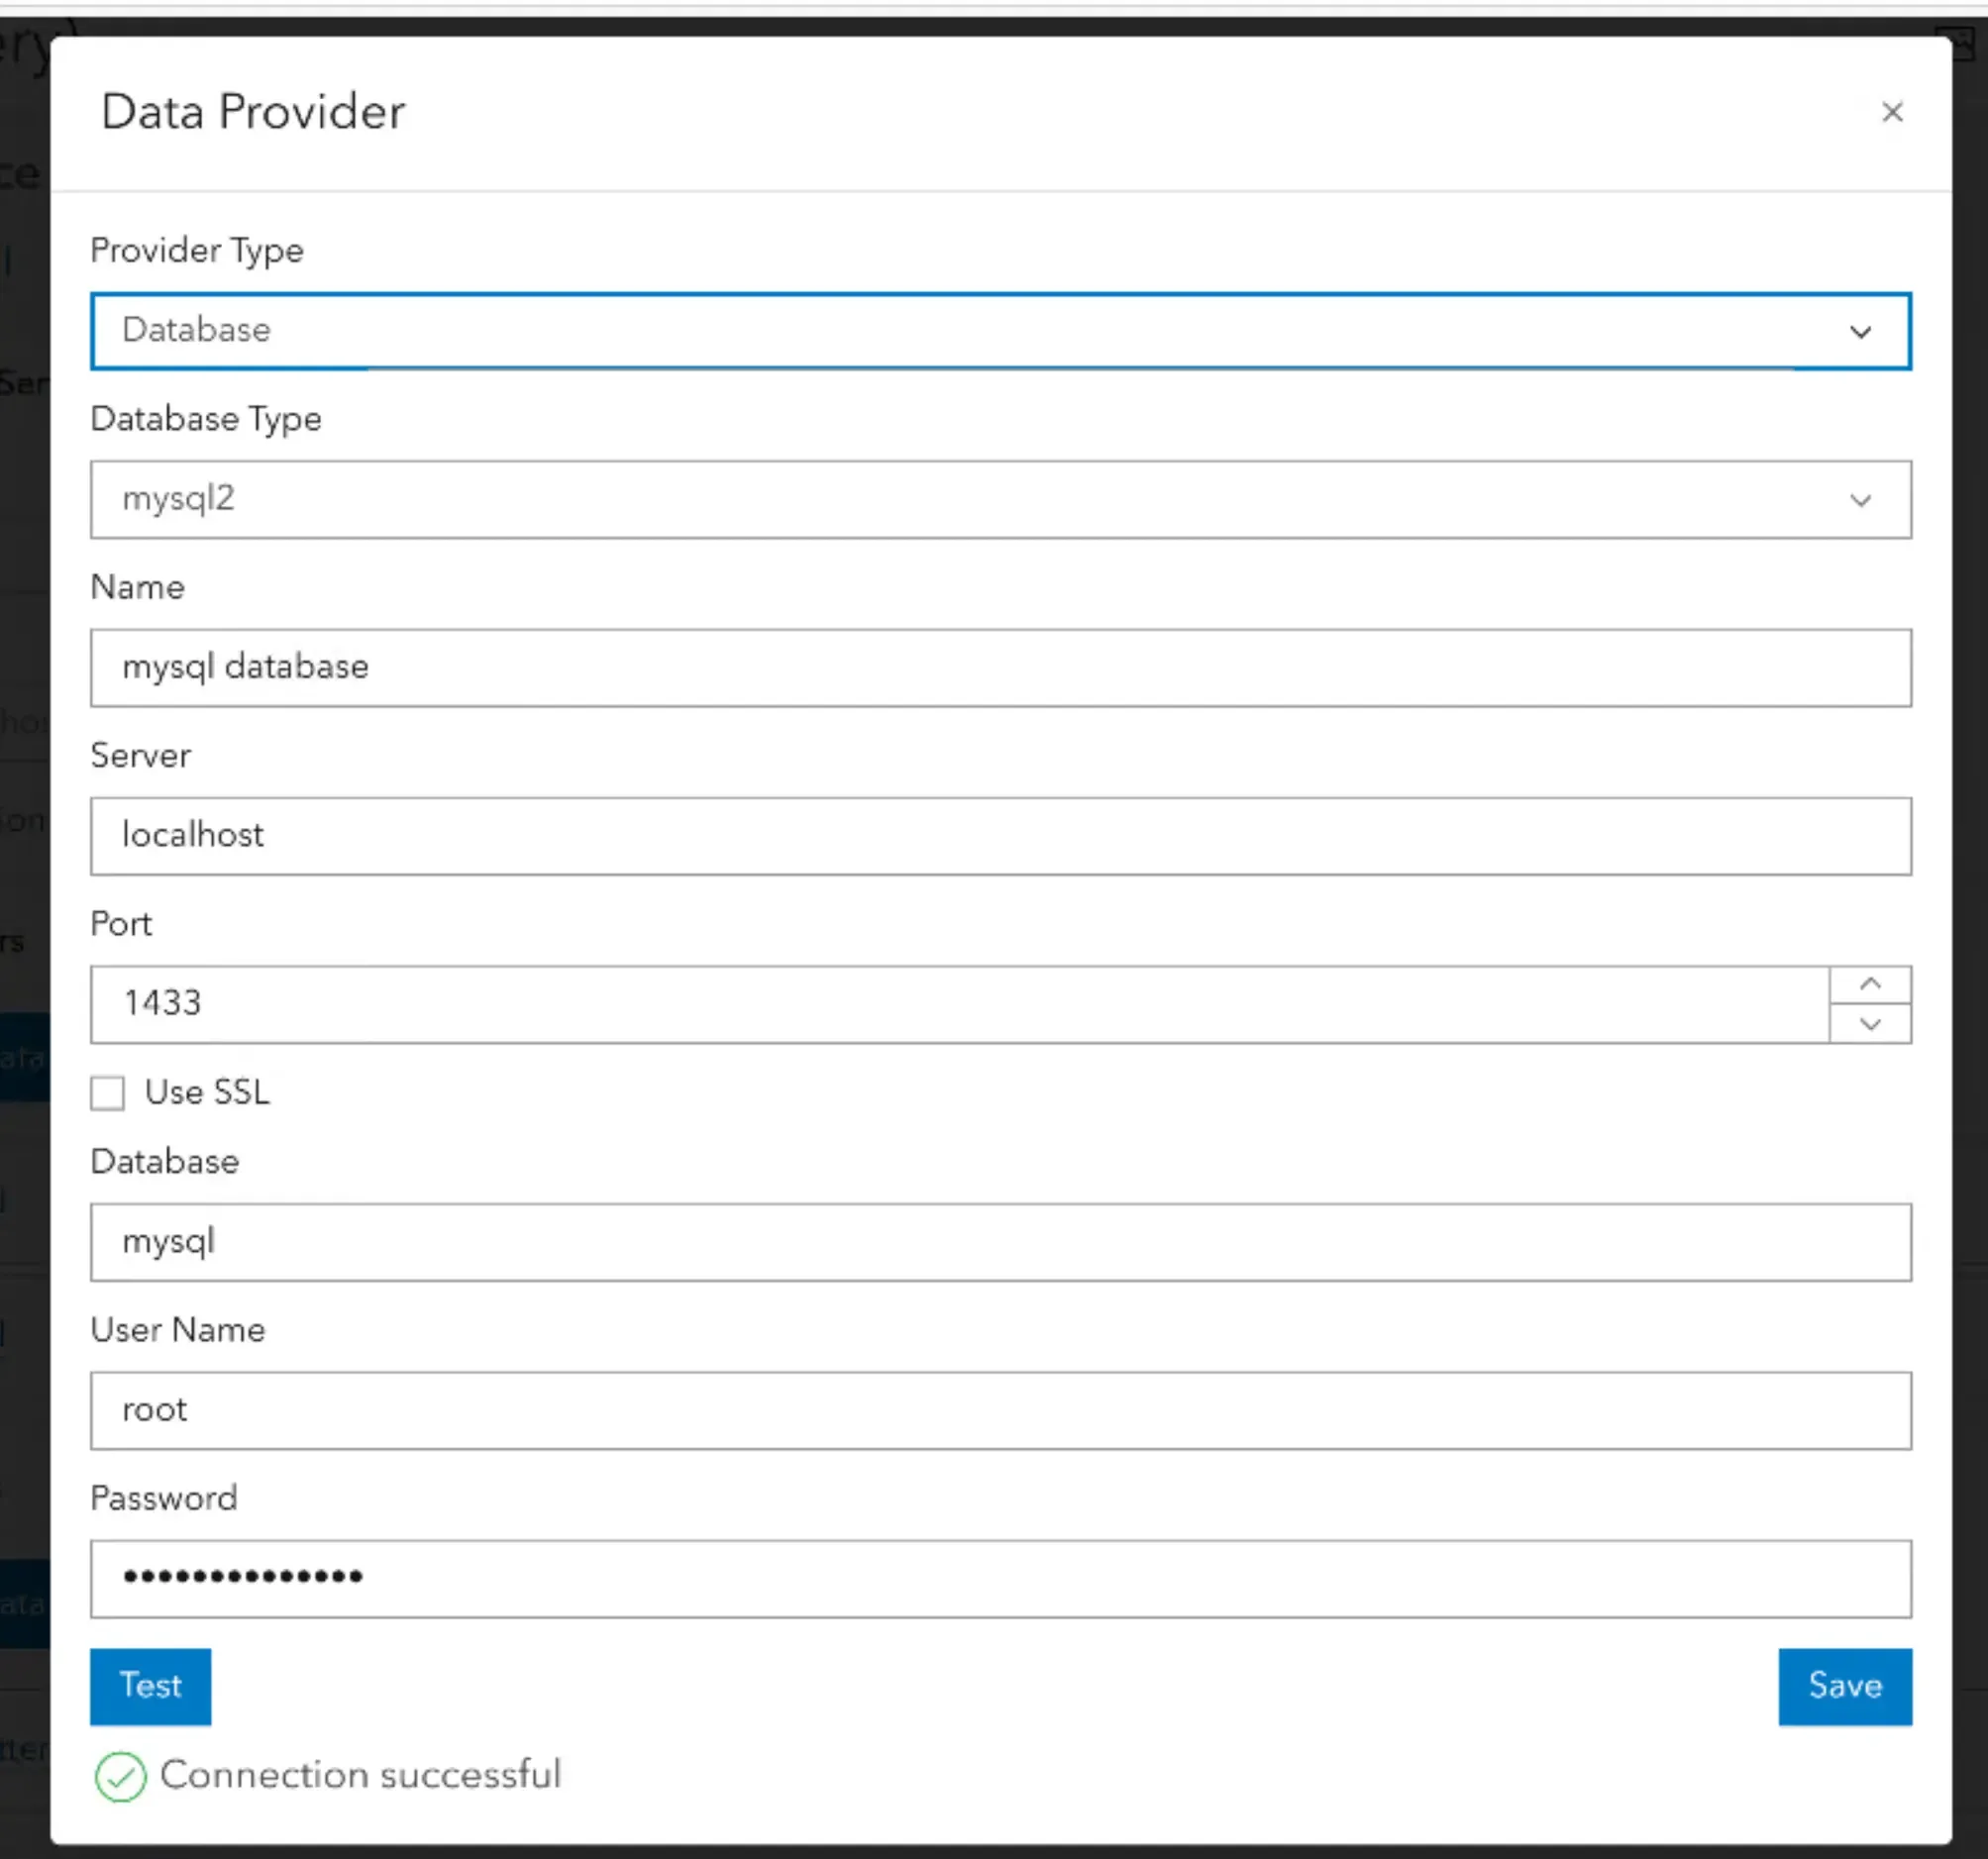
- Test if the database is valid by hitting the Test button. If valid, a green tick will appear. If invalid, a red cross will appear and prevent saving until corrected.
- Click Save.
Adding a Data Source
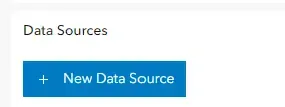
Ensure you have followed the steps to add a Data Provider before adding a data source. Click New Data Source to get started.
From ArcGIS
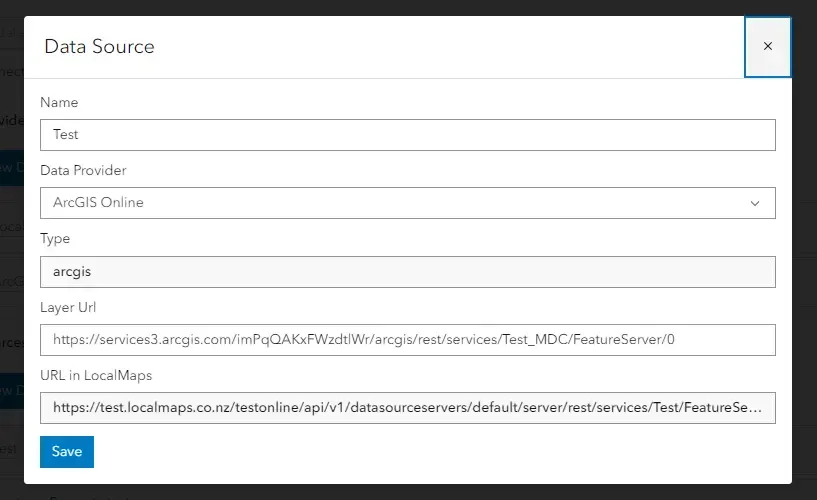
- Give the data source a name.
- Select your ArcGIS online/portal from the dropdown menu.
- The type will be set by default once the Data Provider is selected.
- Input your layer URL.
- The URL will automatically update to reflect the changes.
From a Database
- Give the data source a name.
- Select your database from the Data Provider dropdown.
- The type will be set by default once the data provider is selected.
- Input the name of the table you wish to access.
- The URL will automatically update to reflect the changes.

Using Data Sources
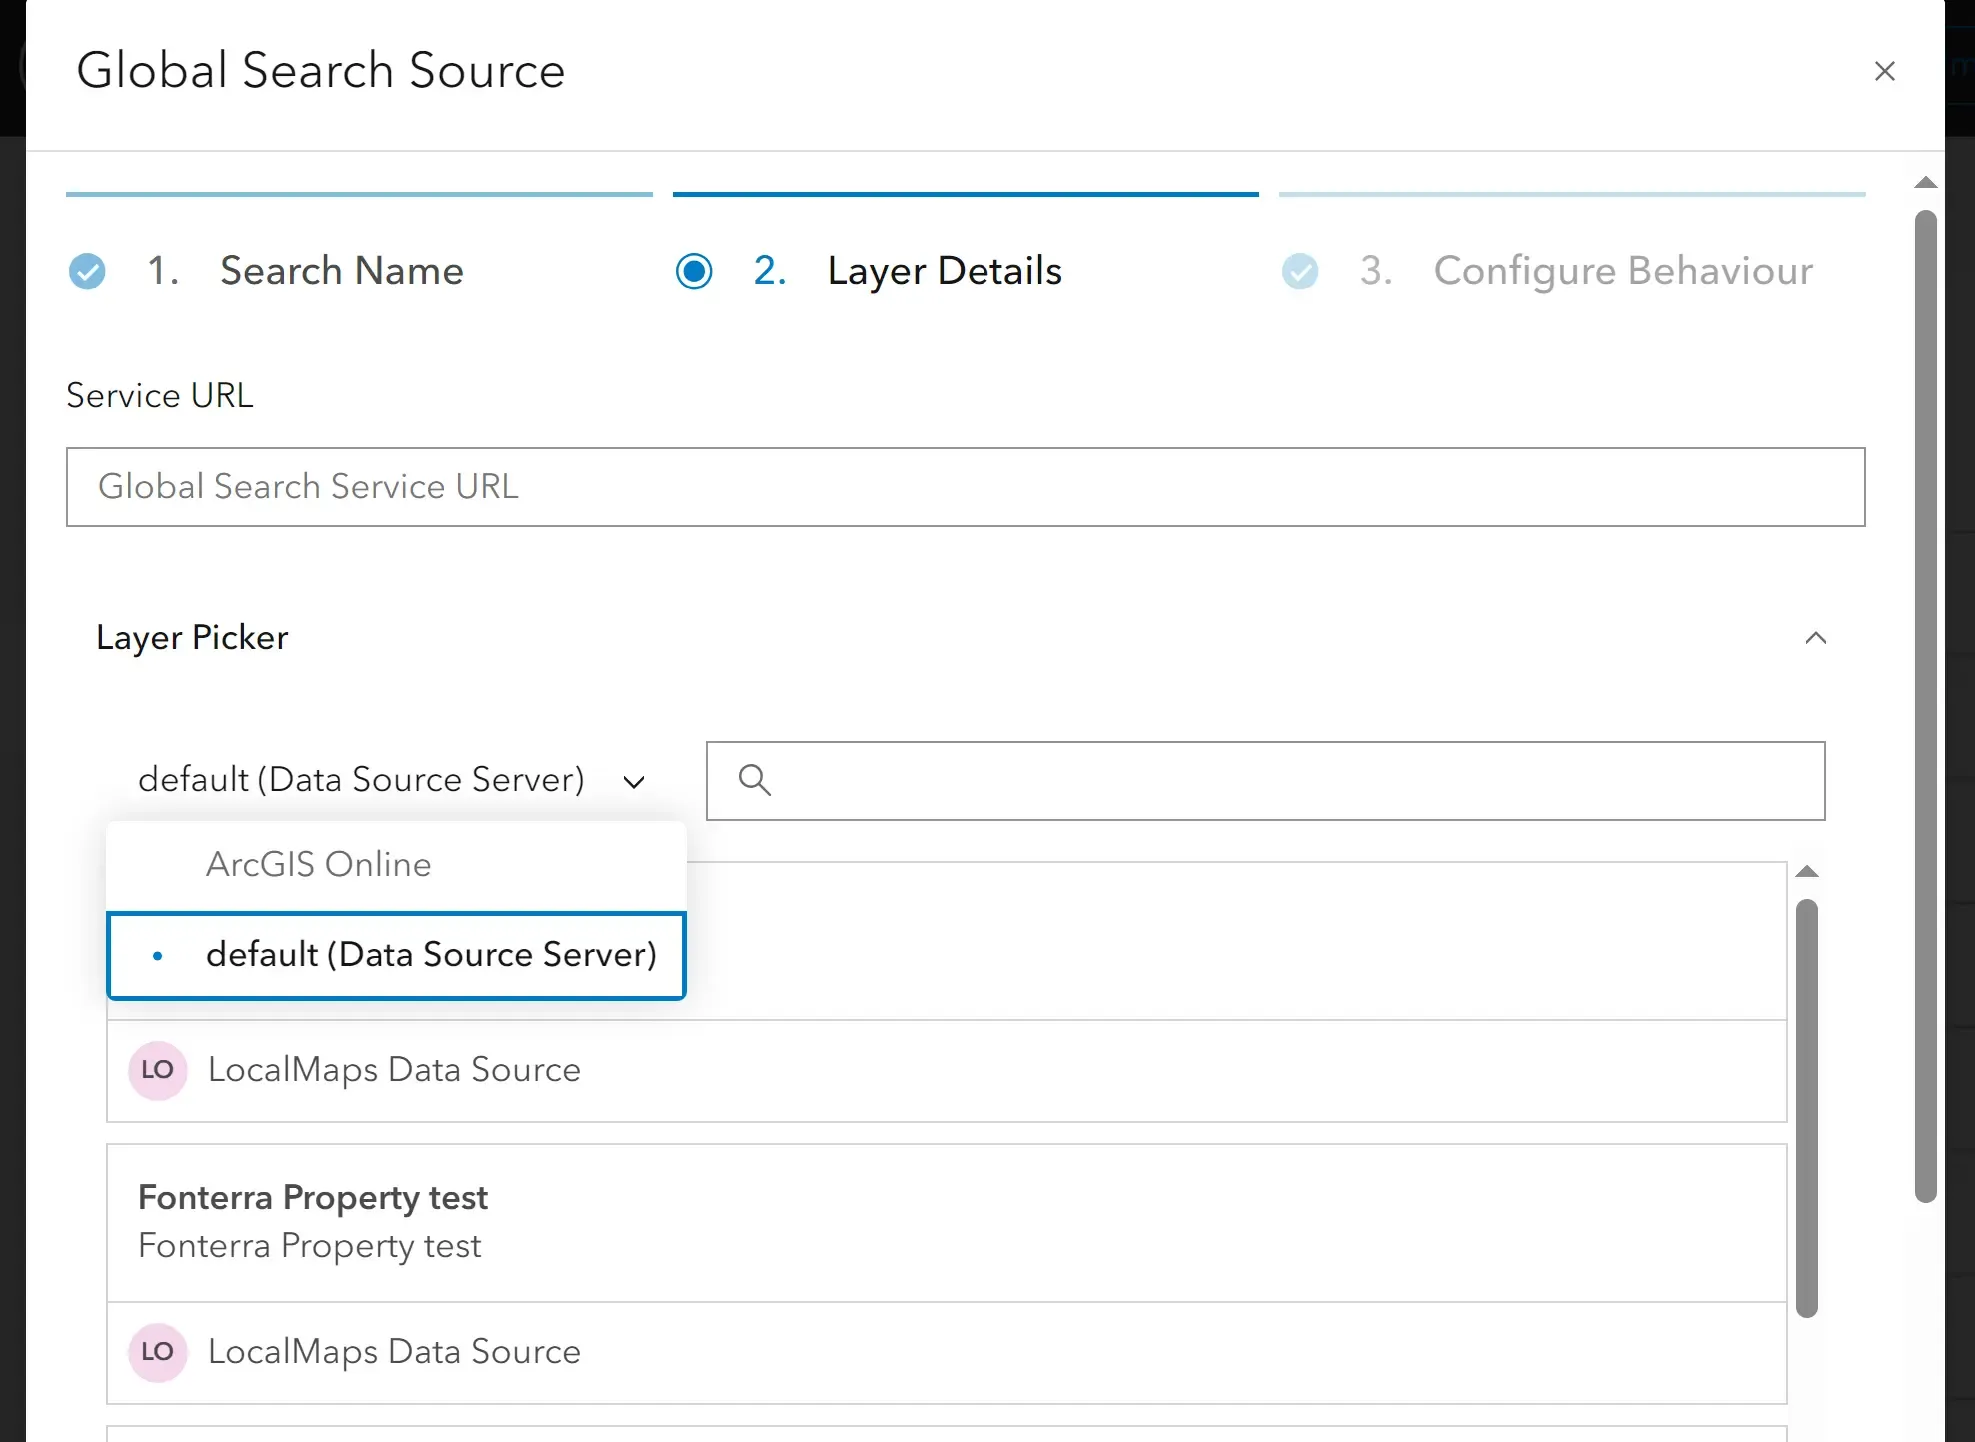
Once data sources are set up, they will be available to select from in the searches, feature query, and reports setup menu. They can be found under the Layer Picker dropdown.
Version 3.2
Data Sources in LocalMaps 3.2 offer the following enhancements:
- The Data Source and Data Provider Menus have a search bar and filter options.
- Privacy settings: Data Sources can be individually configured to be private or public, along with whitelisting fields you want to expose from each Data Source.
- Stored Procedures and Views can now be configured for database Data Sources.
ArcGIS Online, Enterprise or Server Data Sources
- Click the Data Sources tab in the Admin panel.
- Click on the existing Data Source Server.
- Under Data Provider, click Add New Data Provider.
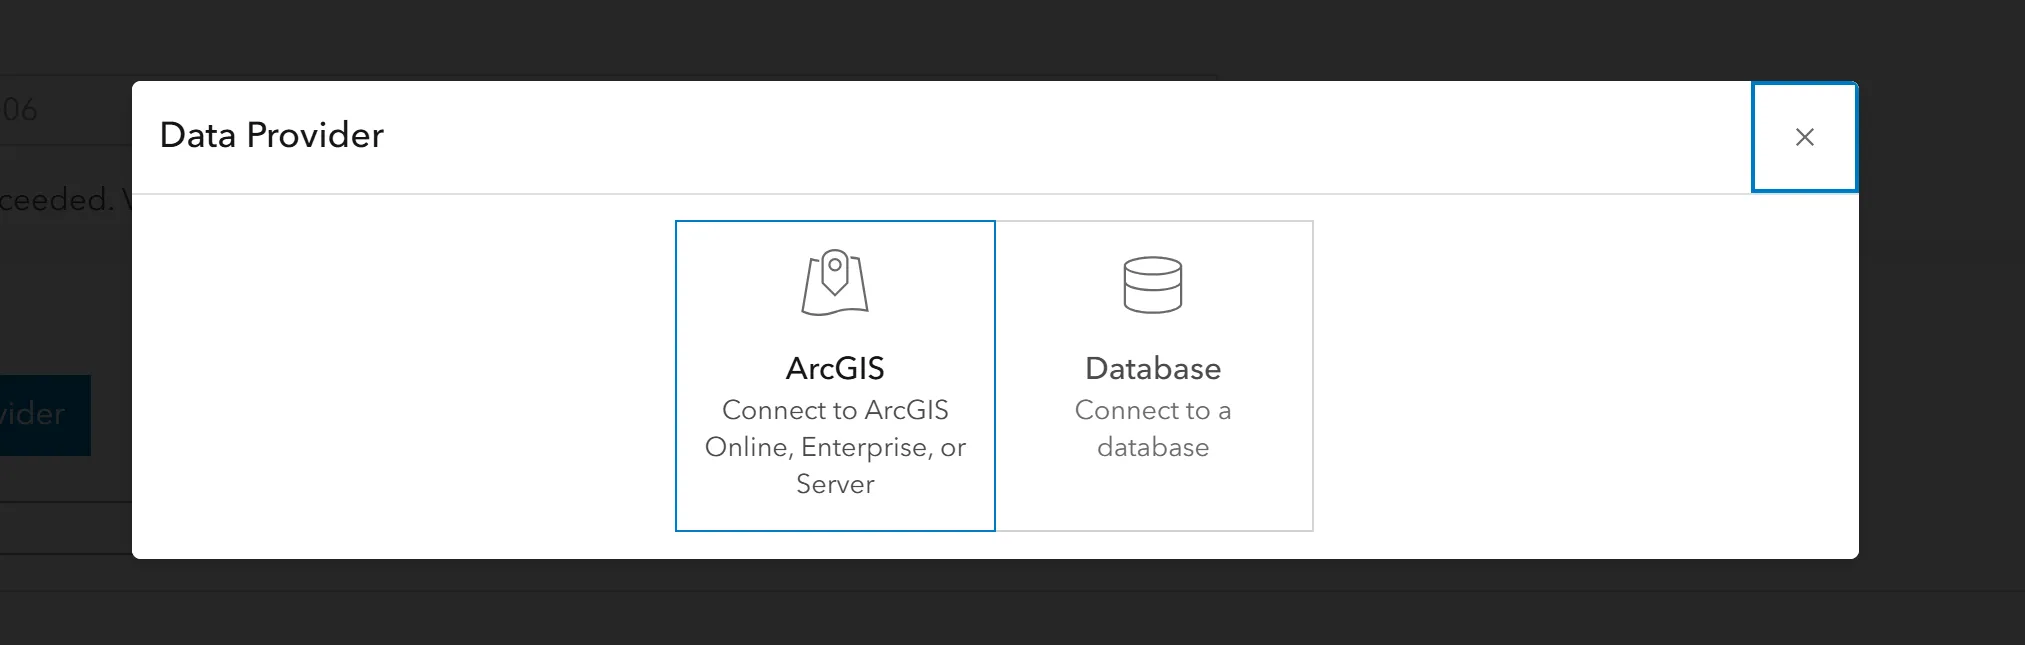
- Select ArcGIS. The following screen will appear:
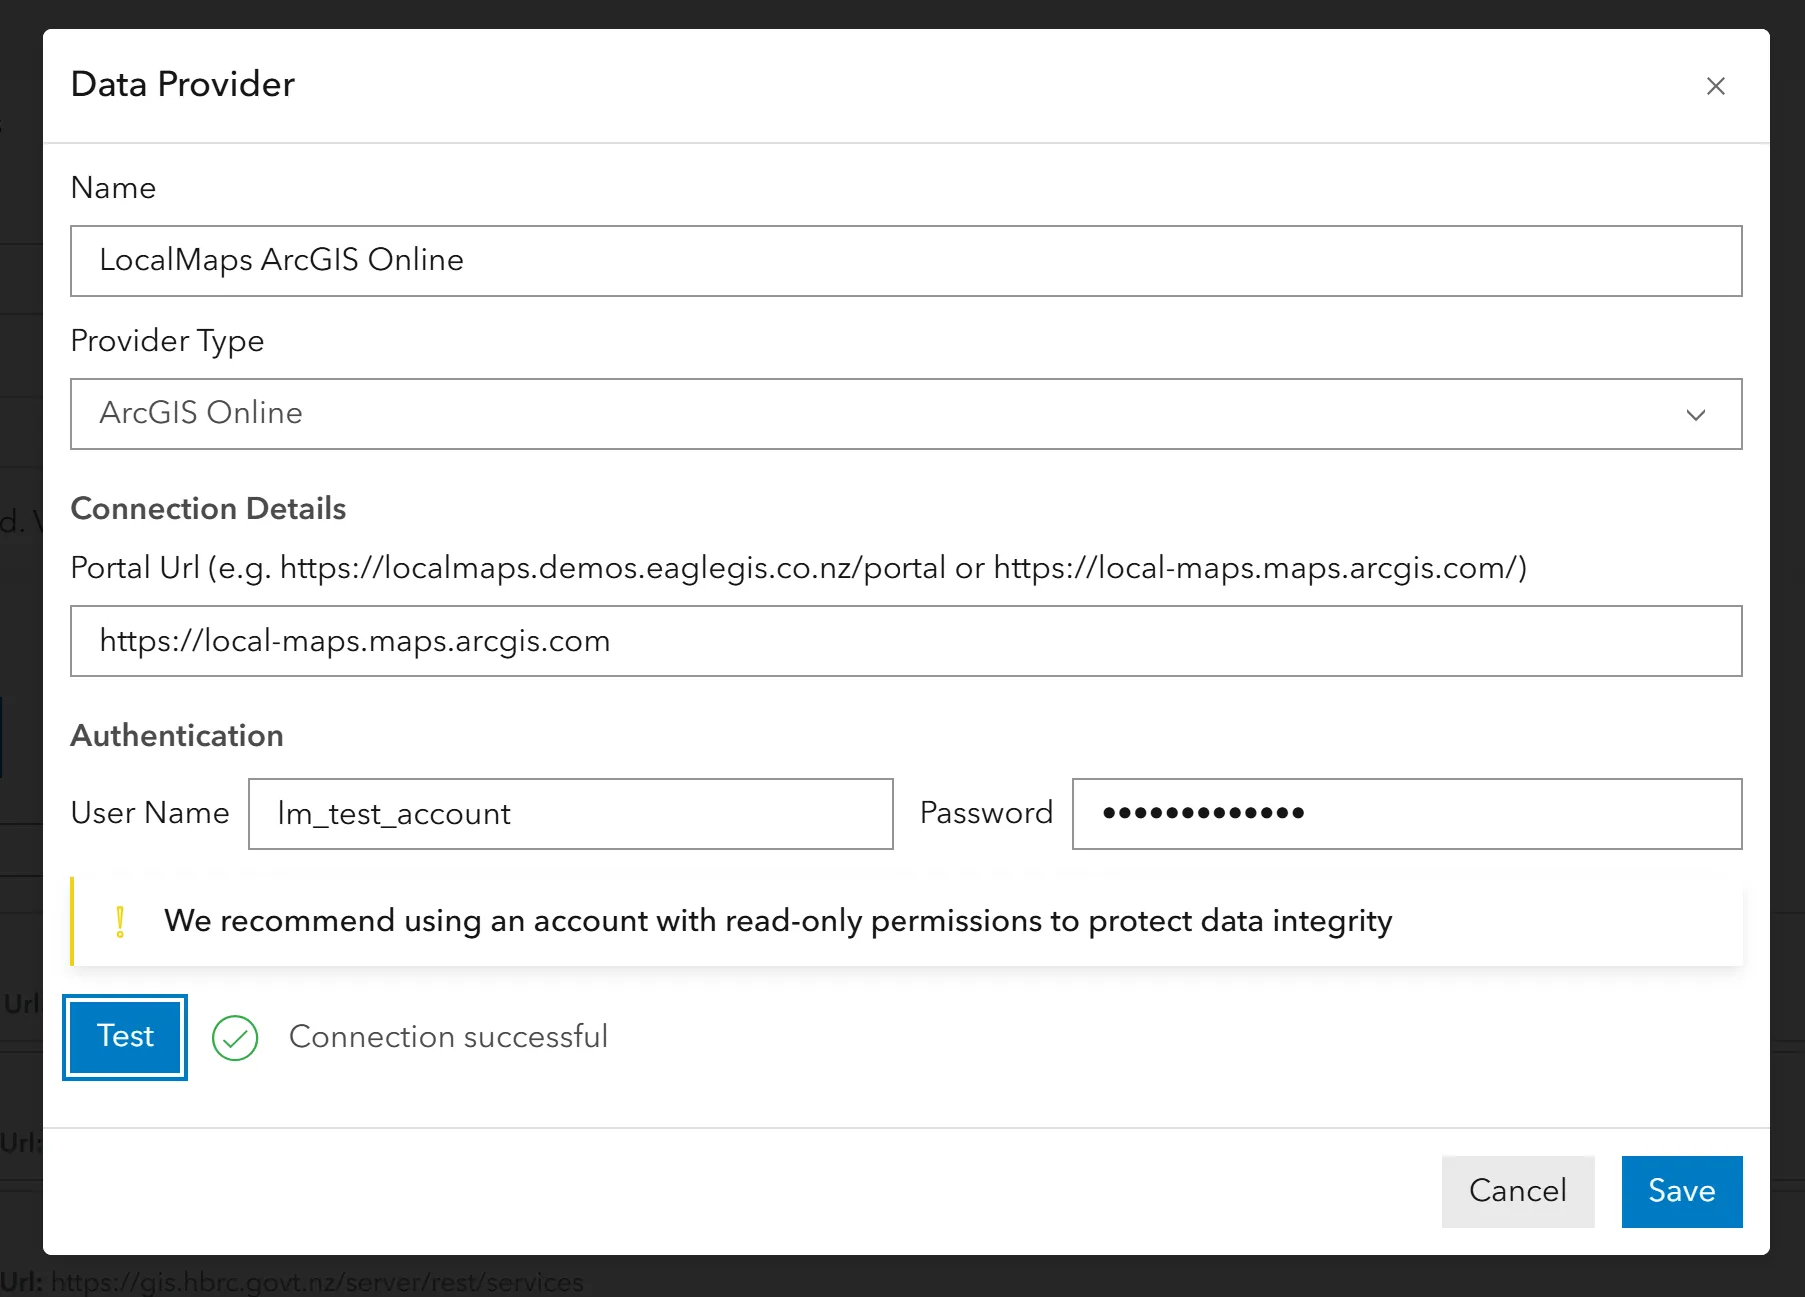
- Name: A name for the data provider.
- Provider Type: The type of data source being used (e.g. ArcGIS Server).
- Portal/Online URL: Enter the URL along with administration Username and Password.
- Test if the Service is valid by hitting the Test button. If valid, a green tick will appear. If invalid, a red cross will appear and prevent saving until corrected.
- Click Save.
Database Data Sources
Data Sources can be set up to read information directly from SQL Server, MySQL, or Postgres. By leveraging LocalMaps Data level integration, you can consume and display related information directly within a layer’s popup, removing the need to write complex views or overnight processes.
- To add a new database, go to the database tab and click New Data Provider.

- Select database. The following screen will appear:
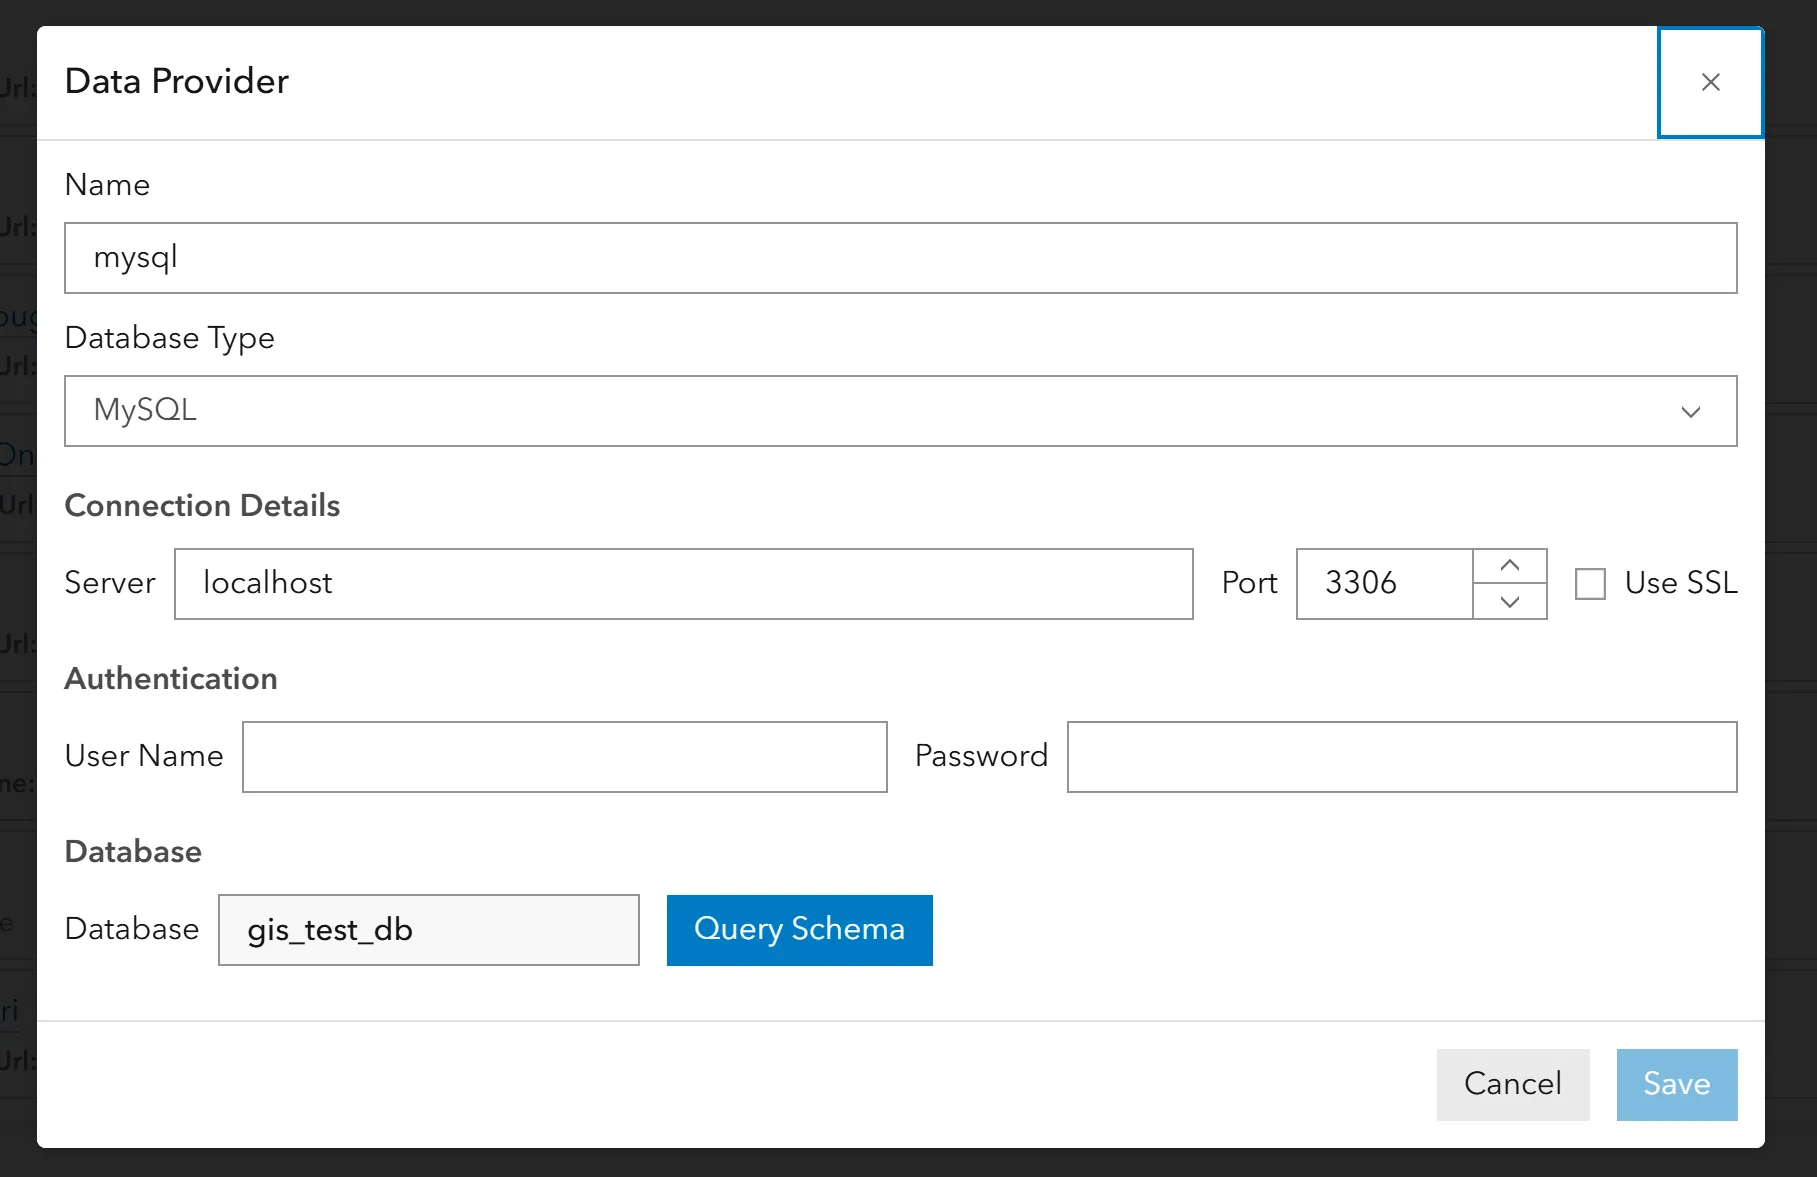
- Name: A name for the menu.
- Database Type: Select the type of database (e.g. SQL Server, MySQL, Postgres).
- Server: Database server name (or IP address).
- Port: Port that the database server is running on (change only if applicable).
- Enable SSL: For Postgres or MySQL databases. If your database has SSL Support, tick the “Use SSL” checkbox.
- User Name: User to connect to the database. For PostgreSQL, this user should have access to a database with the same name.
- Password: Password to connect to the database.
- Database: Click Query Schema to test the connection and select your database from the dropdown.

- Click Query Schema to test the connection. If valid, a green tick will appear. If invalid, a red cross will appear and prevent saving until corrected.
- Click Save.
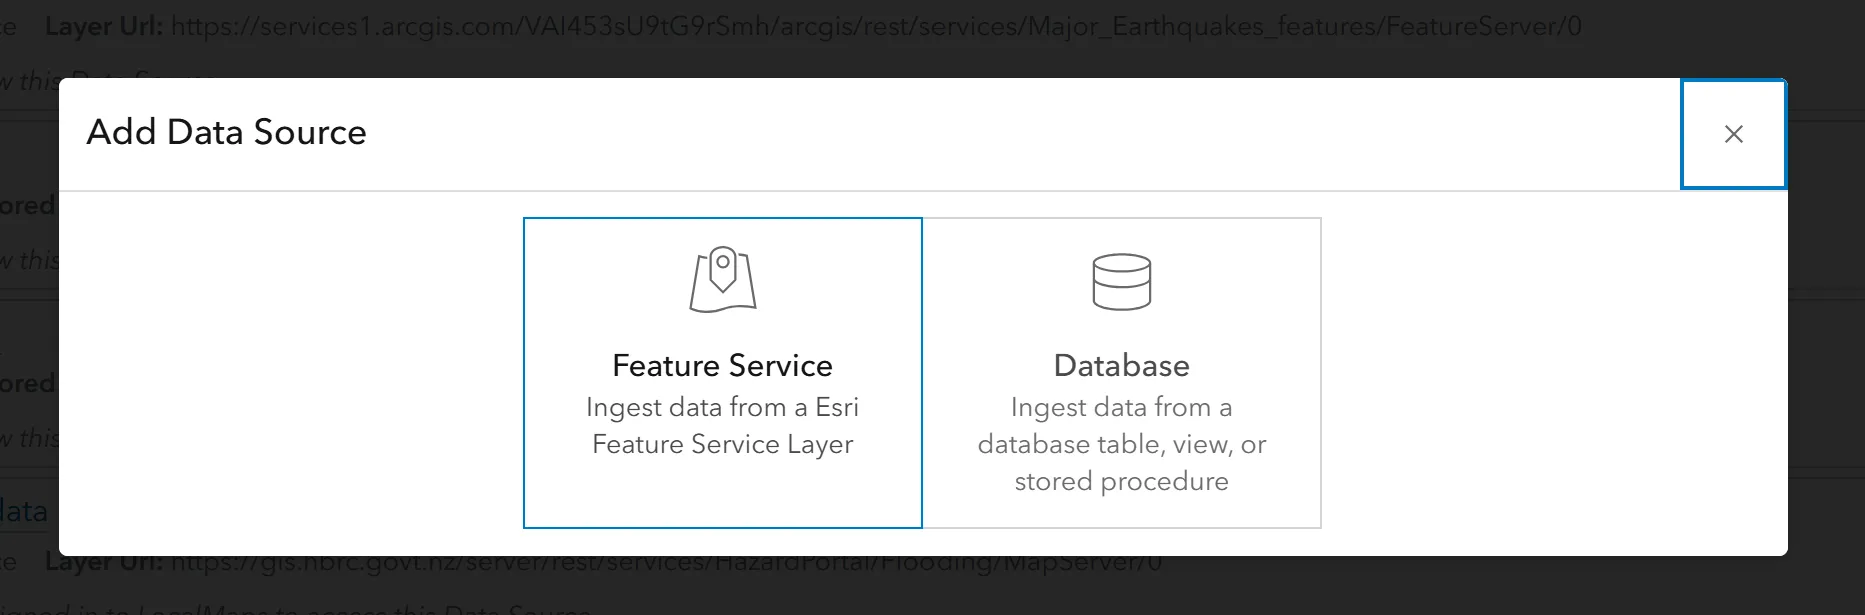
Adding a Data Source
Ensure you have followed the steps to add a Data Provider before adding a data source. Click New Data Source to get started.

From ArcGIS
- Select Feature Service.
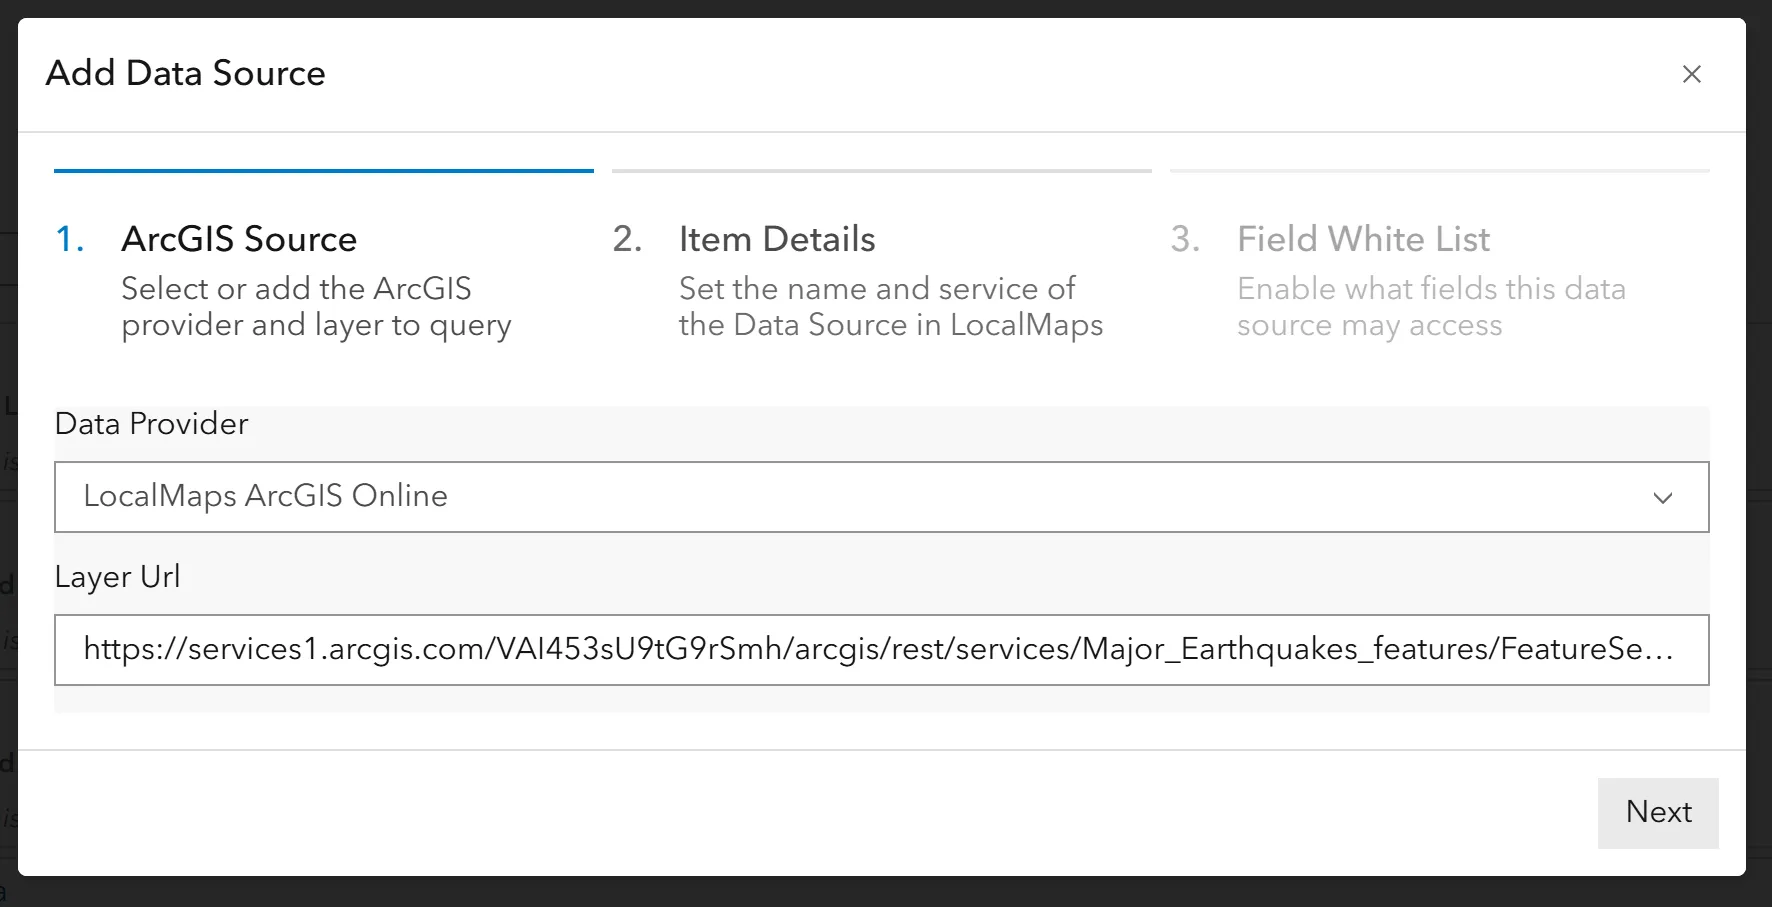
- Select your configured ArcGIS Online/Portal/Server from the dropdown menu.
- Provide the layer:
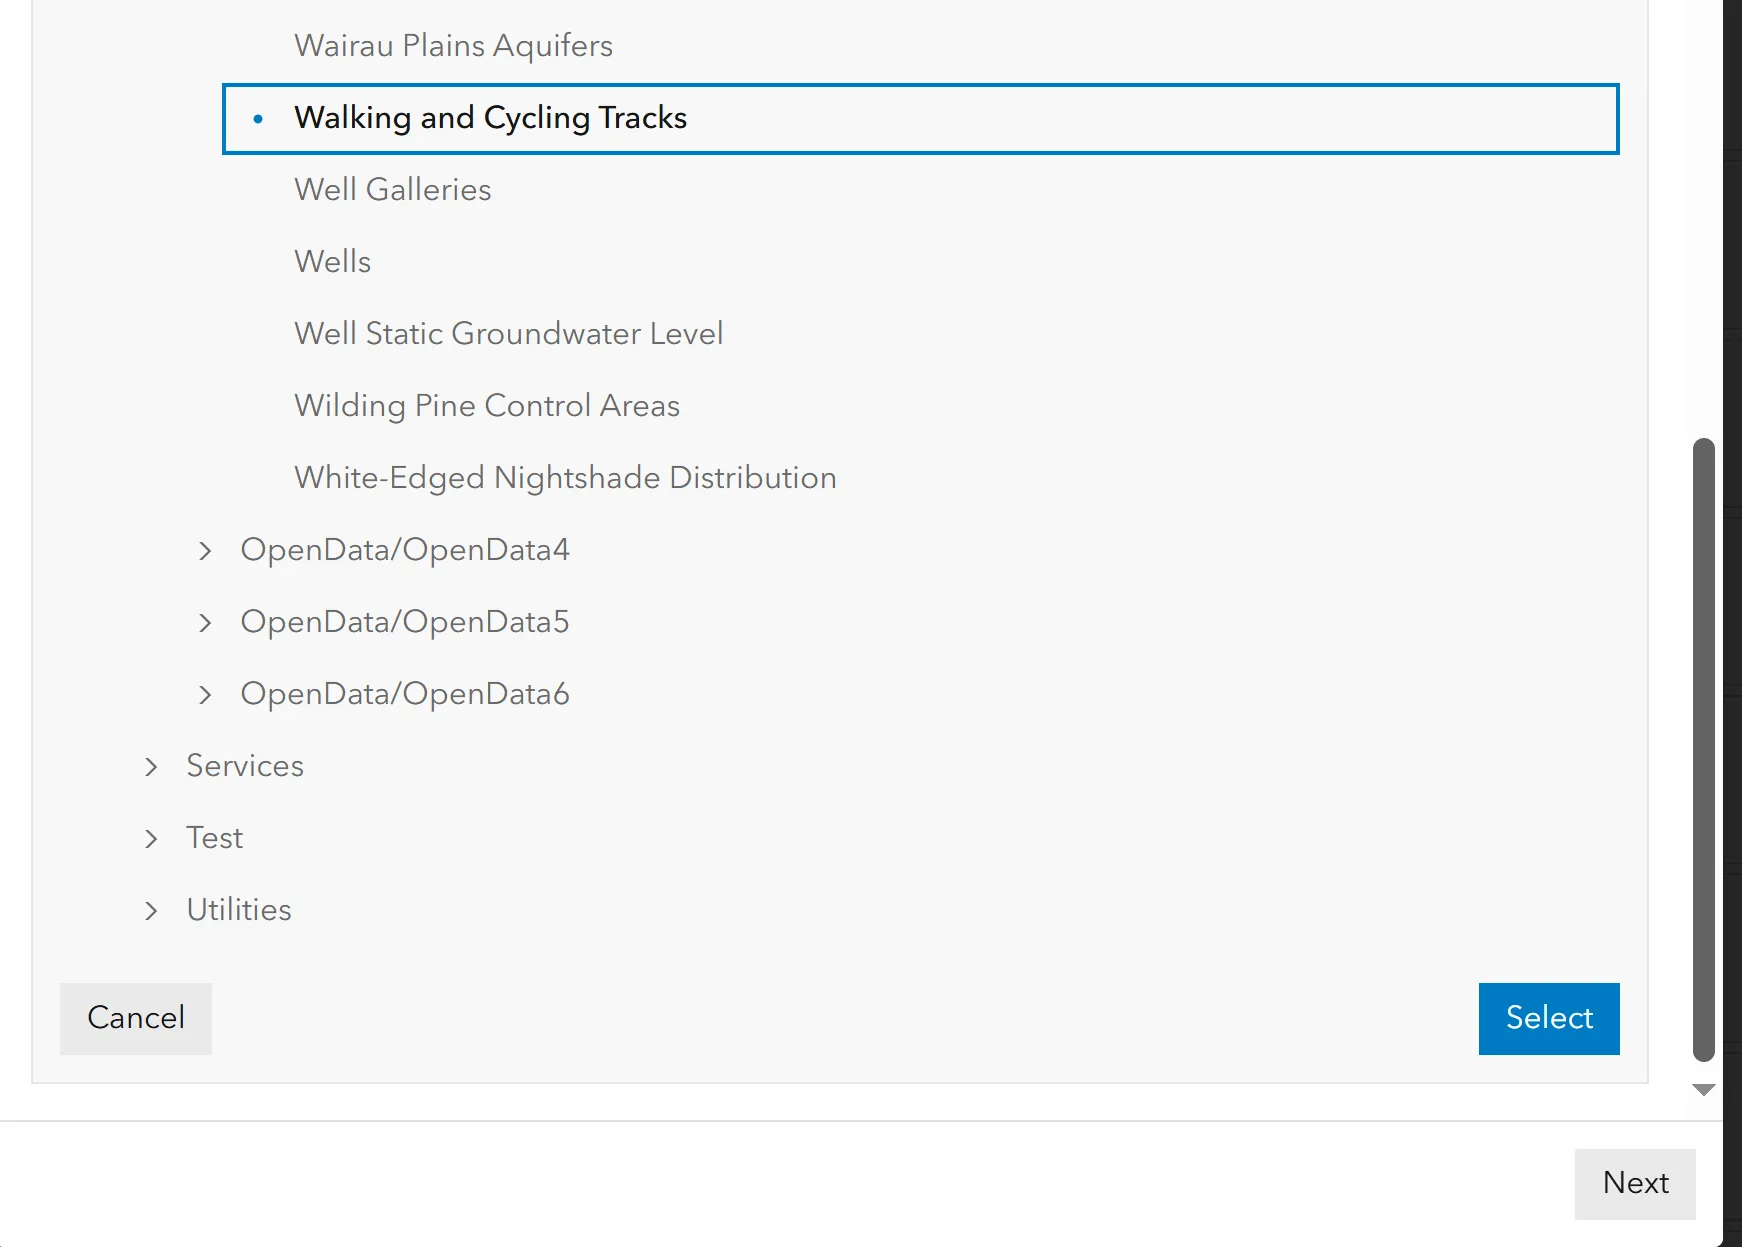
- For ArcGIS Online or Portal Data Providers, input the layer URL into the textbox (found on the item details page of the layer in ArcGIS Online or Portal).
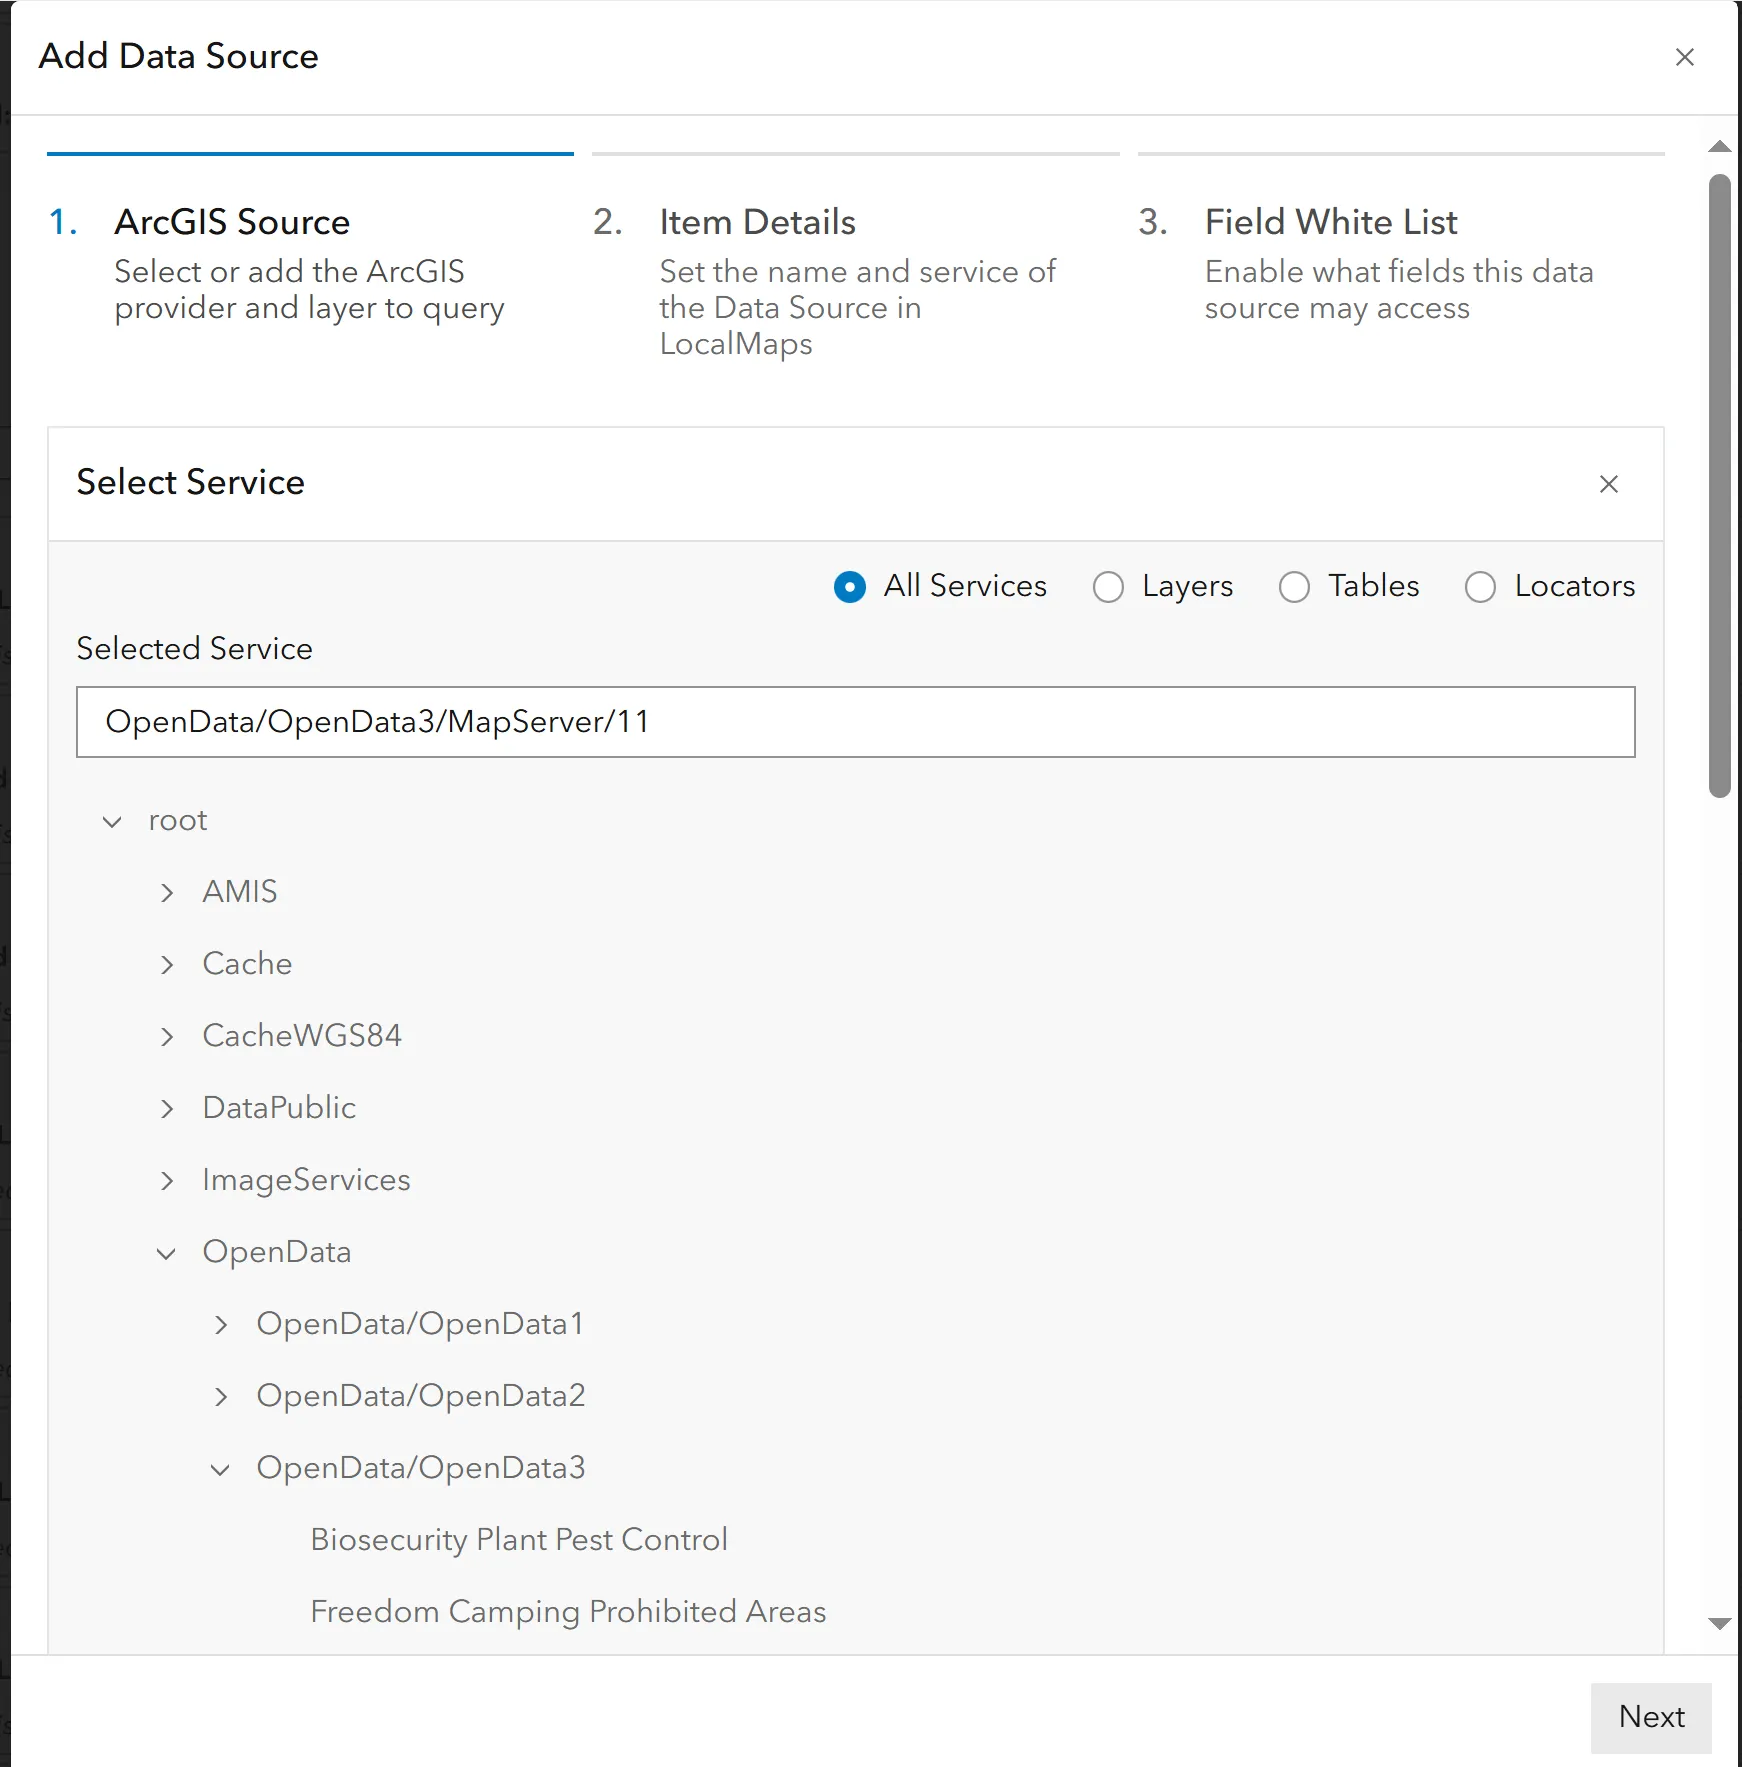
- For ArcGIS Server, click Browse Services. This displays the list of available services to choose from, with filter options. Select your service, then click Select.
- For ArcGIS Online or Portal Data Providers, input the layer URL into the textbox (found on the item details page of the layer in ArcGIS Online or Portal).
- Click Next to move to the Item Details section.
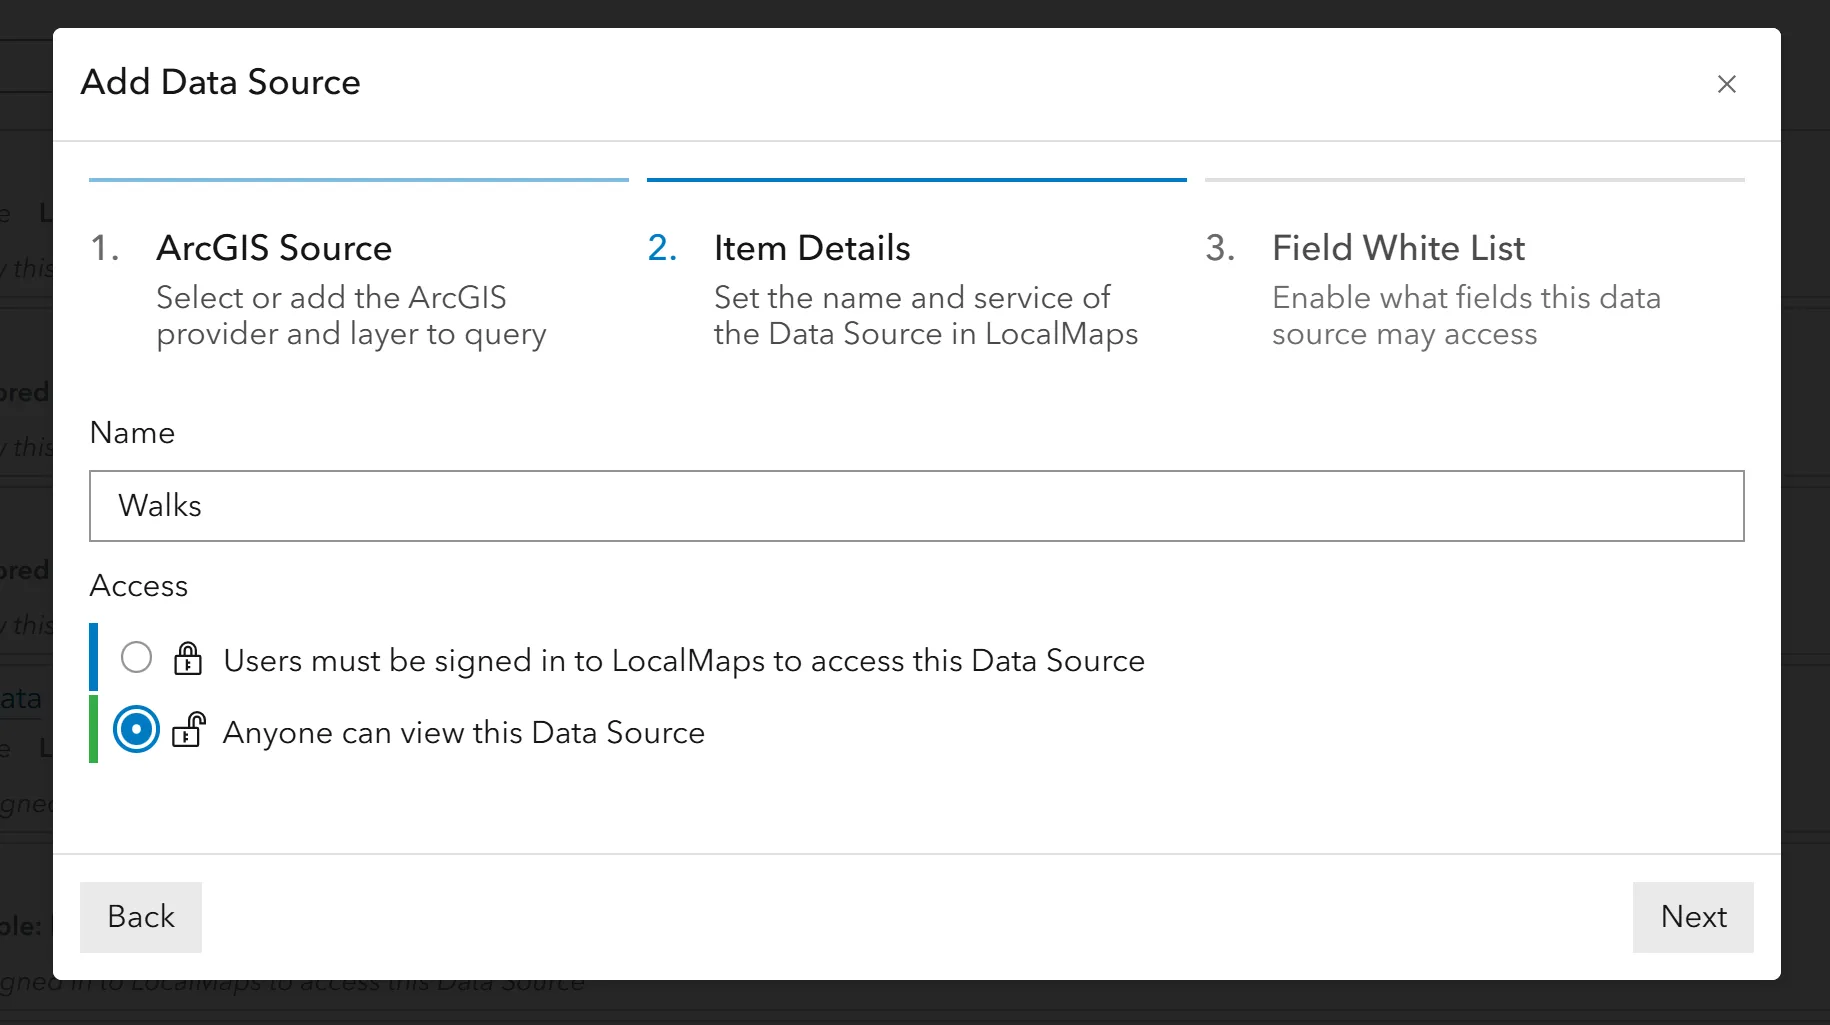
- Input the name you want for your Data Source, and select the access level you require.
- Click Next to move to the Field White List section.
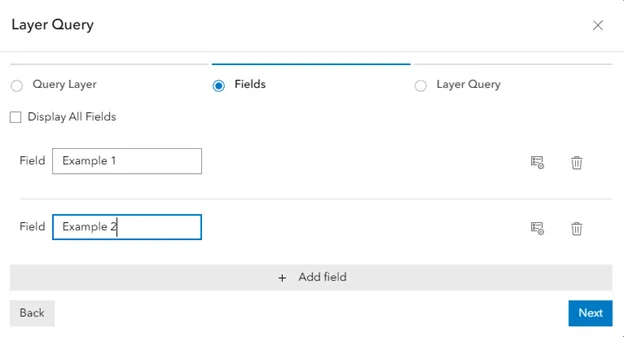
- Field White List is where you choose which fields from the Data Source you want exposed. Selecting a field allows it to be used throughout the LocalMaps application.
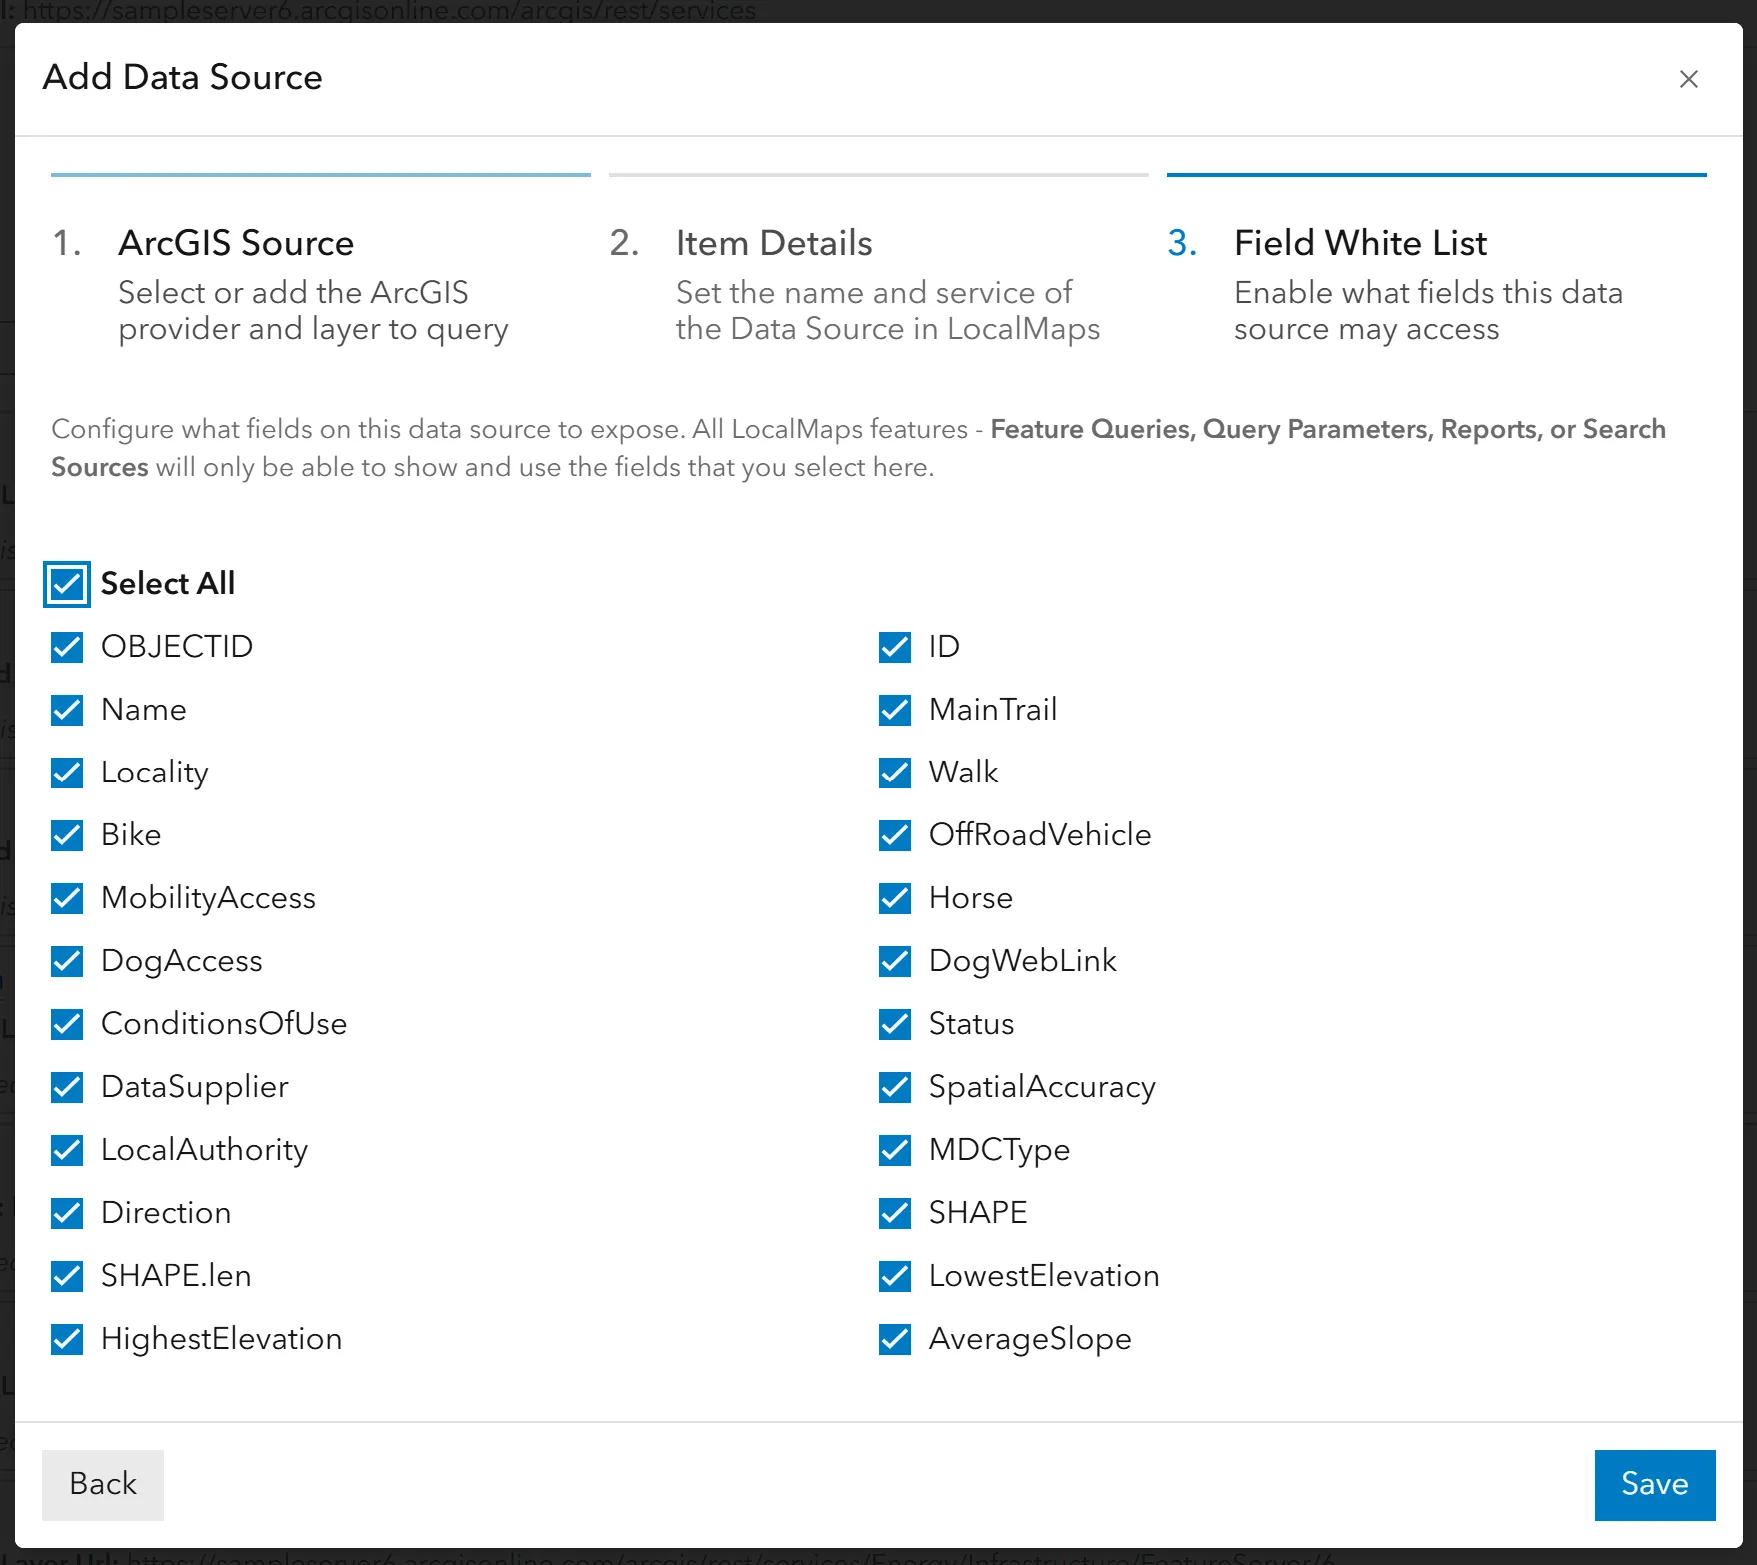
- Click Save.
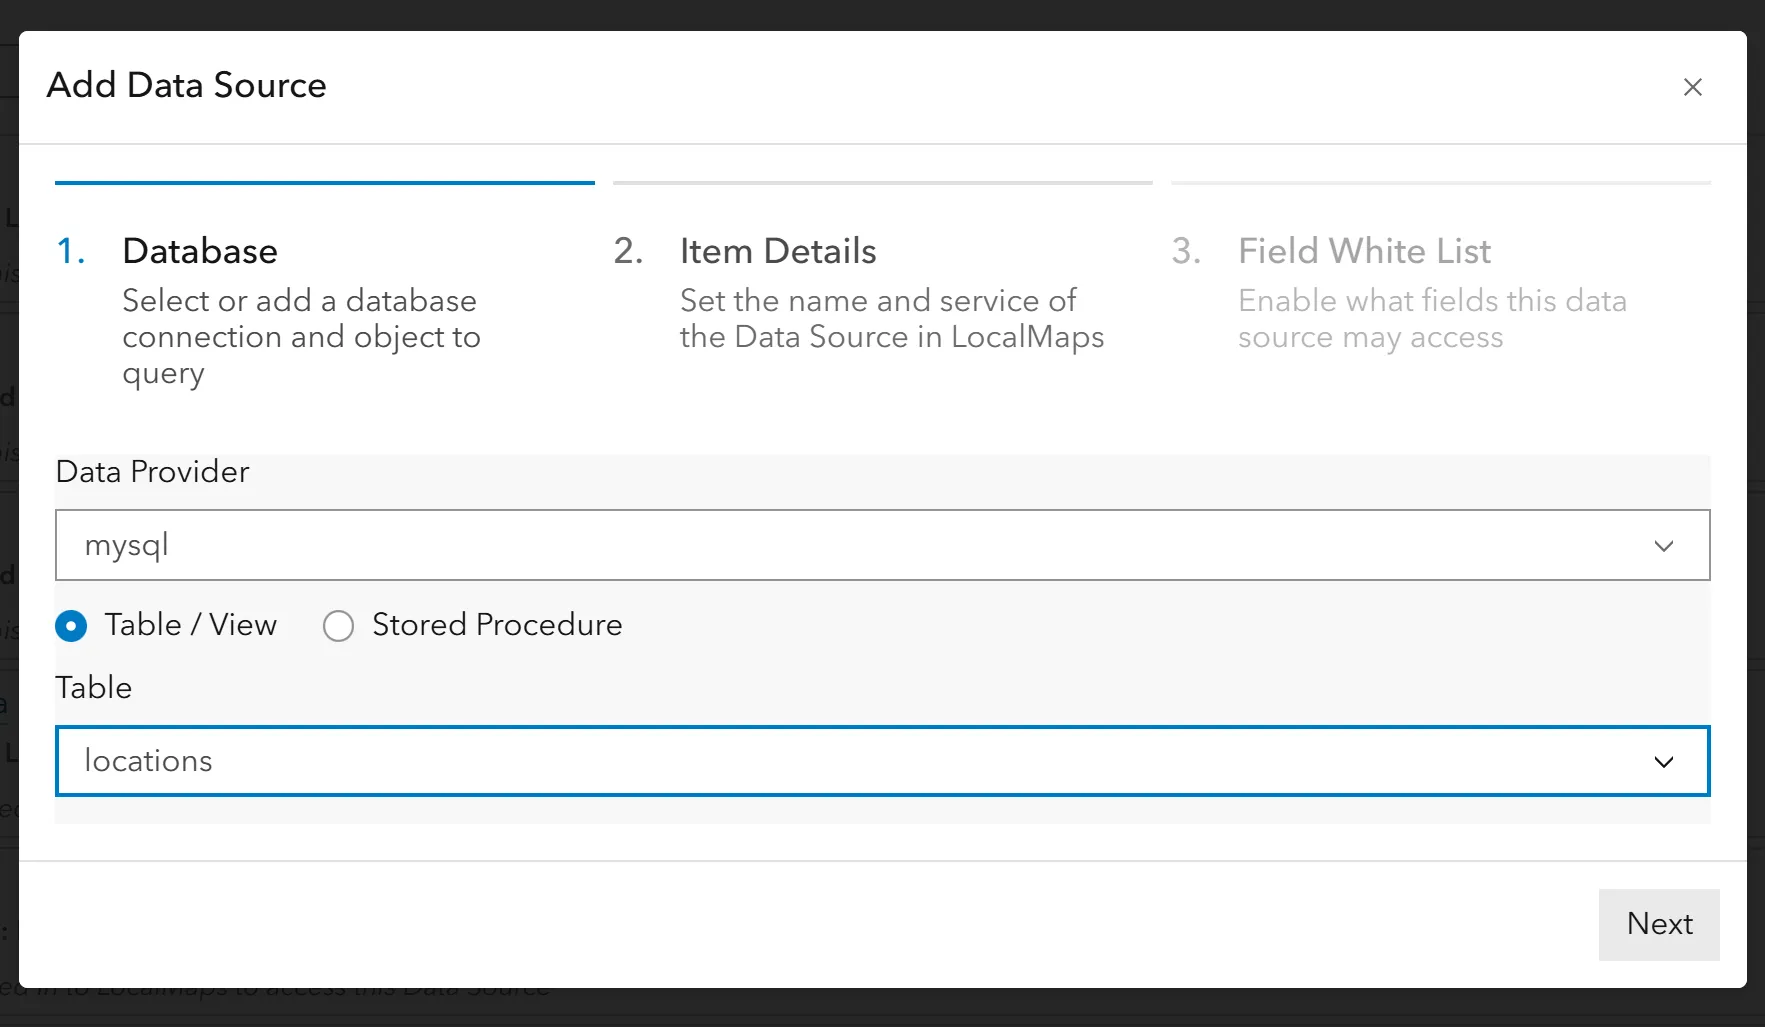
From a Database
- Select Database.

- From the dropdown, select your Data Provider. Select Table / View or Stored Procedure, and from there select your chosen Data Source from the dropdown.
- Input the name you want for your Data Source, and select the access level you require.
- Click Next to move to the Field White List section.

- Field White List is where you choose which fields from the Data Source you want to expose. Selecting a field allows it to be used throughout the LocalMaps application. For Stored Procedures, this page will be blank if one has been selected.

- Click Save.
Using Data Sources
Once Data Sources are set up, they will be available to select from in the searches, feature query, and reports setup menu. They can be found under the Layer Picker dropdown.
Stored Procedures
Database Data Sources can optionally be configured to use Stored Procedures (or in the case of PostgreSQL, functions).
Due to the nature of Stored Procedures, it is not possible for LocalMaps to deduce what fields will be output when they are run. These will need to be configured manually in your Feature Queries and Reports.
Stored Procedures will also require parameters to be set by matching layers on your map or report.
Feature Queries
- Continue to the Results Display step as you would with other Feature Queries.
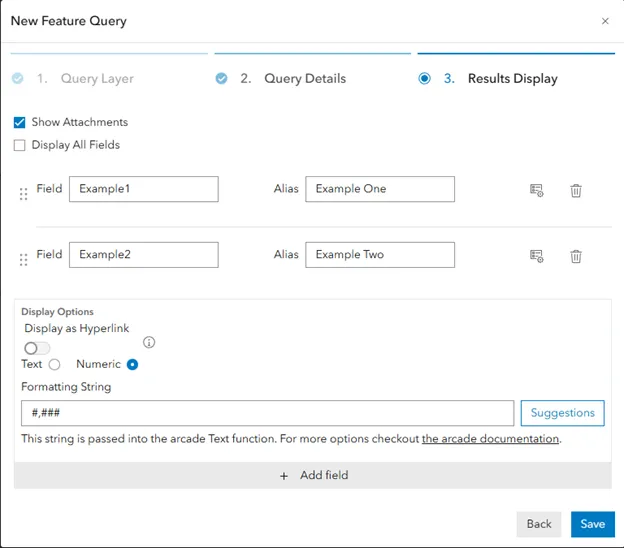
- To output all results of this stored procedure as is on your feature query, leave Display All Fields selected and click Save.
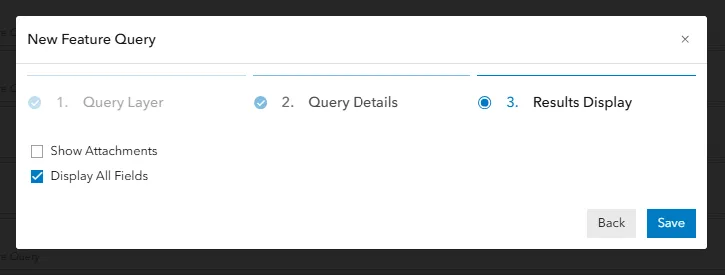
- To manually set the output, unselect Display All Fields. This will open up a blank form to enter Field names, Alias, and Display Options.
- Click Add Field to add additional fields.
- Click Save to continue.
-
- Field: The name of the field as output by the stored procedure.
- Alias: The name of this field as presented to the user (as the table header).
- Actions:
- Display options for this field, you may set it as a hyperlink, numeric format, etc.
- Delete this field configuration row.
- Sorting: You can rearrange your fields by clicking and dragging the six dots at the beginning of each row.
Maps & Apps Configuration
Initially adding a stored procedure Feature Query to a map starts out the same as all other types:
-
On Maps & Apps, select your map.
-
Add a feature query to your map.
-
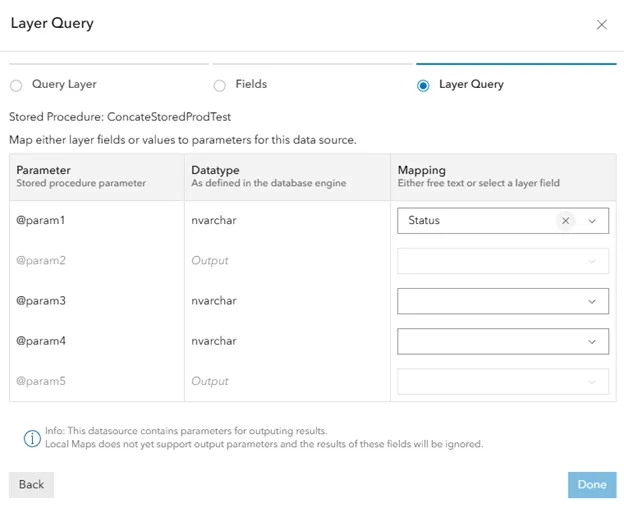
When you select a Stored Procedure feature query, you will be presented with an interface where you may map fields from your map layer to the required parameters for your stored procedure. The form will contain the following three columns:

- Parameter – the name of the parameter (from the Stored Procedure definition).
- Datatype – the datatype configured for this Stored Procedure. This will use the database engine’s own terms. (e.g.
nvarcharfor text). - Mapping – Use this dropdown to select the field from the layer you wish to use in this field. If you need to enter a value (e.g. text, a number, true/false), you can type directly into this field.
A datatype of
Outputsignifies that this parameter has been configured by the Stored Procedure to be used for output results. This parameter can be mapped to any field and should be ignored. Except for PostgreSQL, these output parameters will not be included in results in your feature queries.
Reports
Stored Procedure Data Sources may be used when generating tables on your reports. They may not be used for creating conditional sections at this time.
-
Add a table element
-
Select your Stored Procedure Data Source (Layer Query Type will need to be set to table join)
-
Continue on to the fields tab.
-
You will presented with a similar form as when configuring a feature query with a stored procedure (you will not be asked to configure any alias here – this can be done as per all data sources when configuring the table.)
-
Select ‘Display all Fields’, to use all results from the stored procedure. If you choose this option you will be unable to configure aliases or individual column widgets of this table.
-
Click through to the Layer Query tab. This matches the field mapping interface as when adding a Stored Procedure Feature Query to a map.
- Field: The name of the field as output by the stored procedure
- Alias: The name of this field as presented to the user (as the table header)
- Actions:
- Display options for this field, you may use most formats normally allowed in a report, text, numeric, currency etc.
- The trashcan icon will delete this field configuration row.