Searches
Searches can be added, configured then assigned to a specific webmap. Users can then perform searches from the viewer search bar.
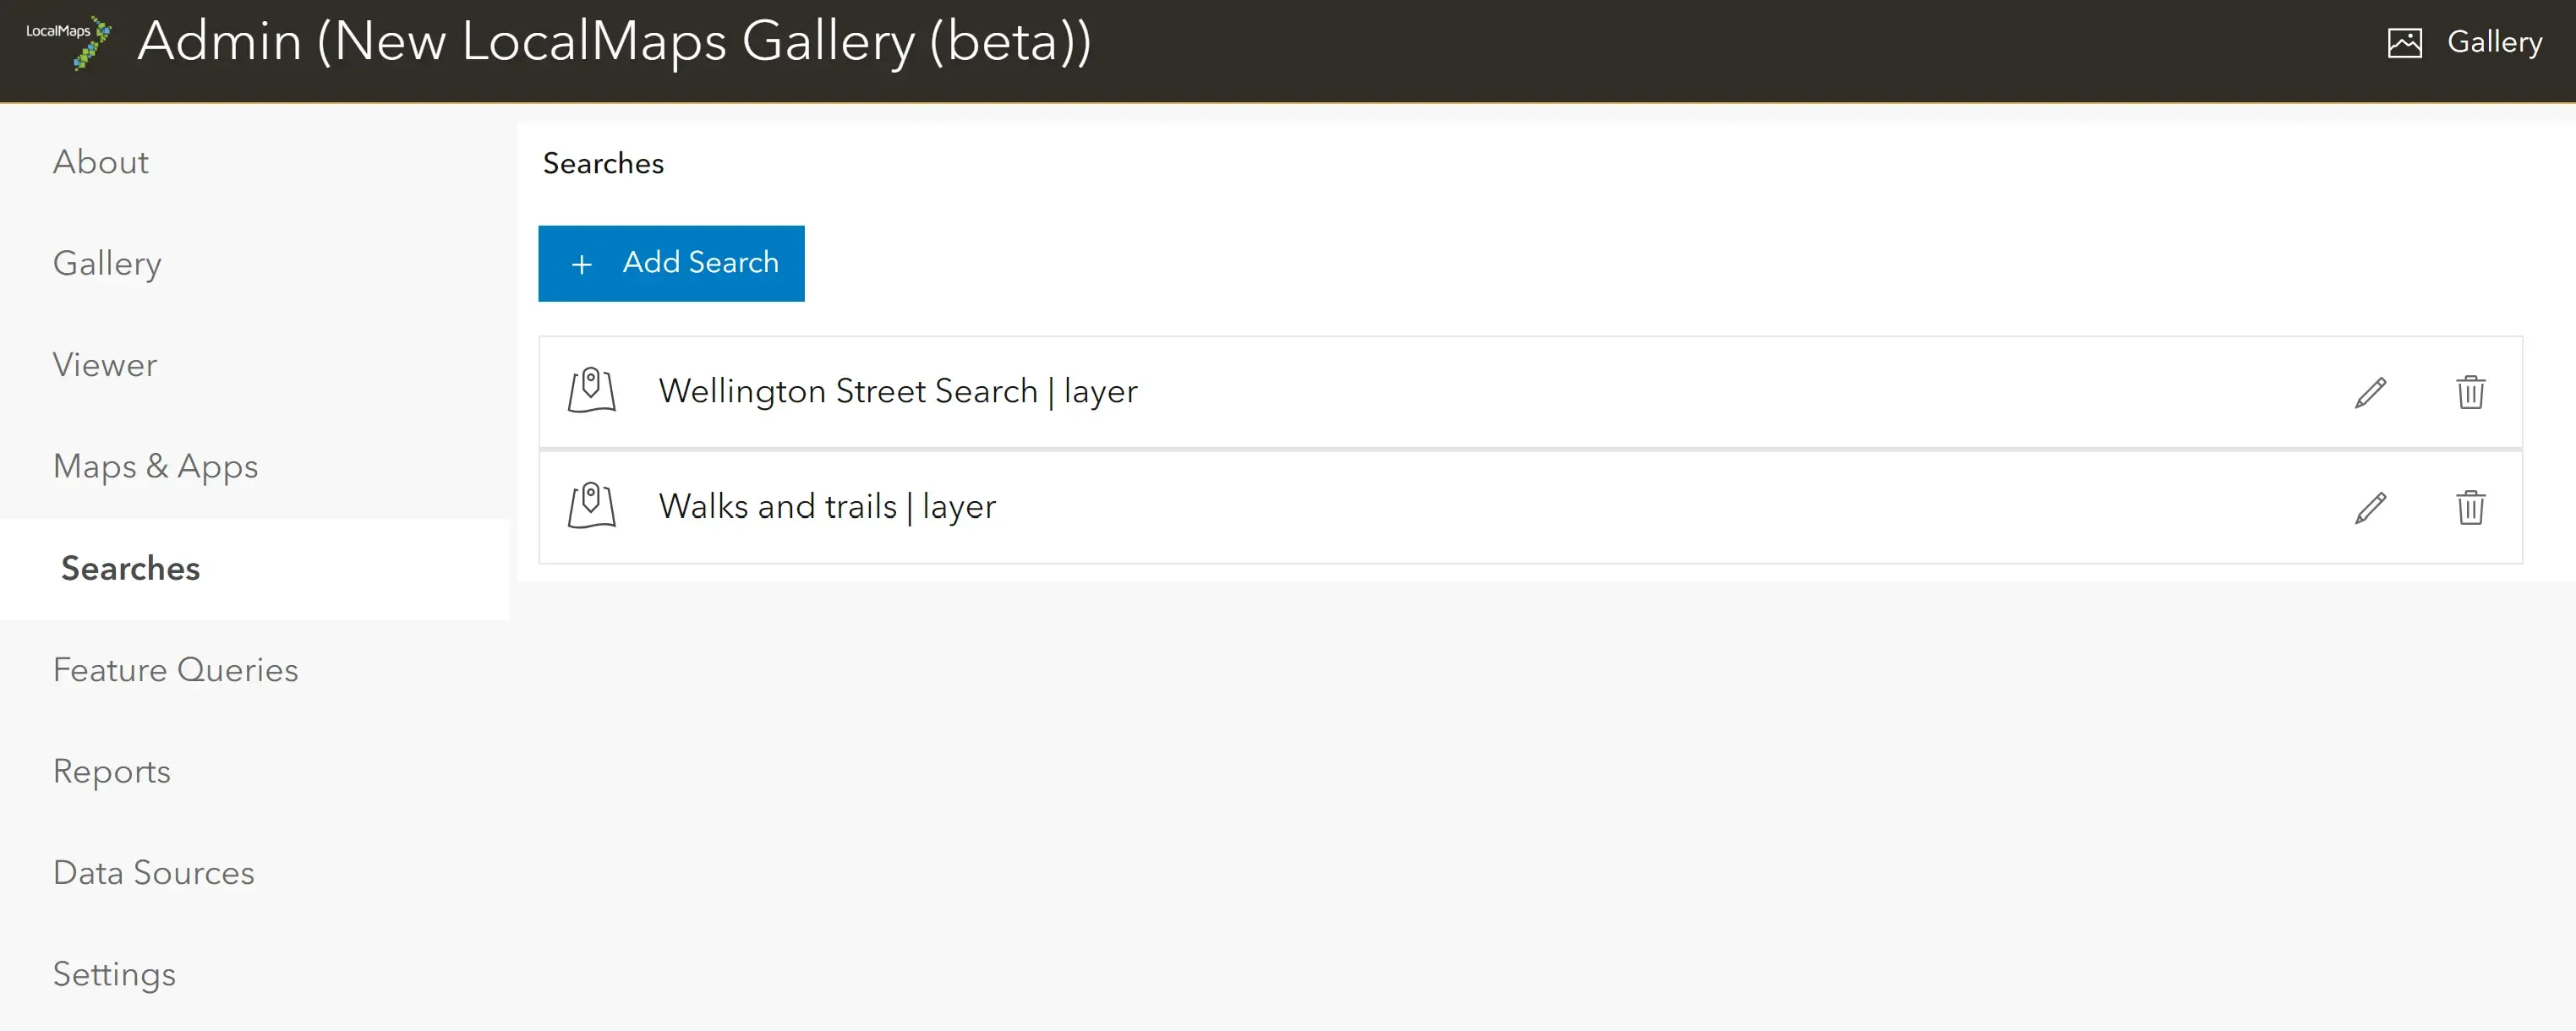
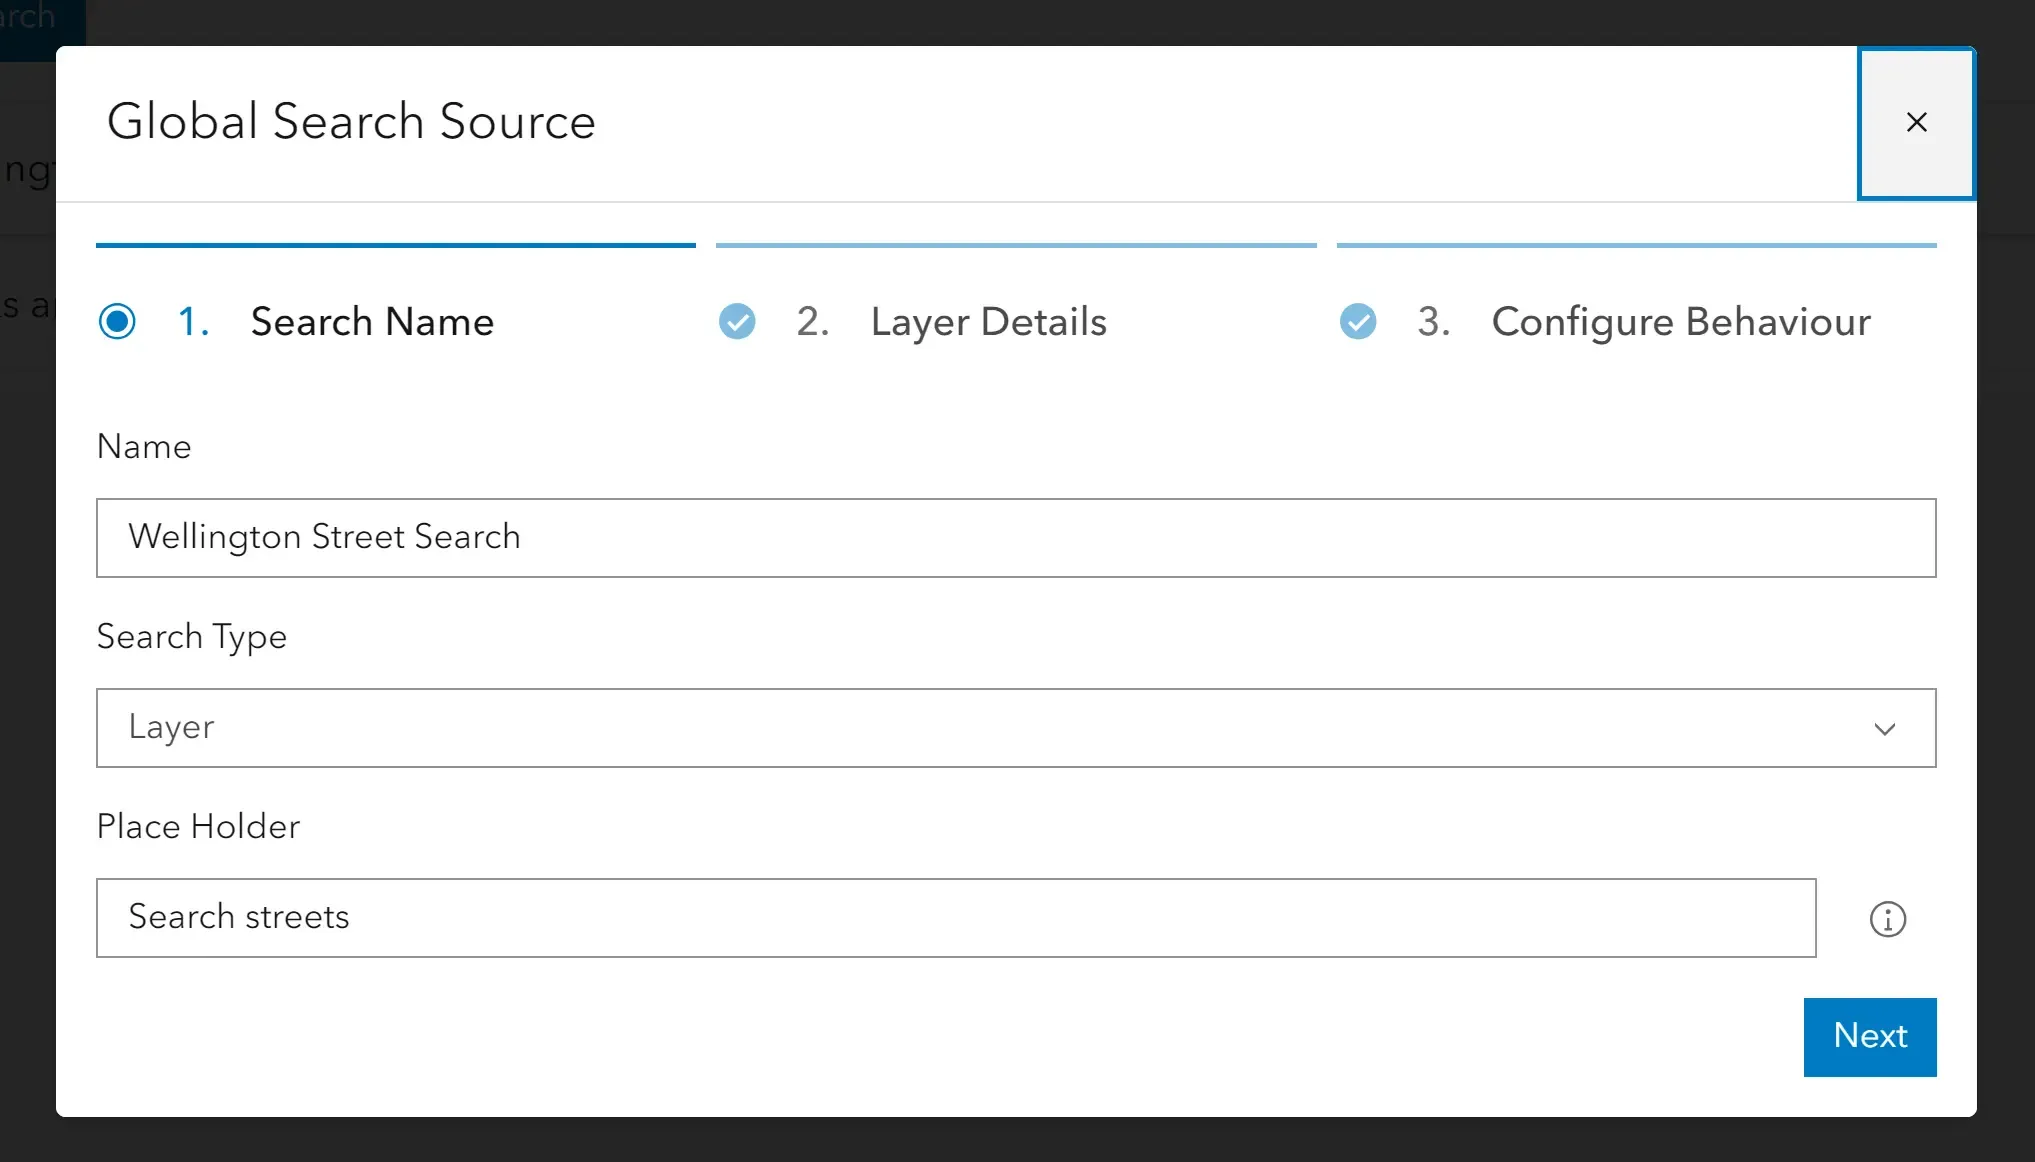
To get started creating a search, navigate to the Searches tab, click “Add search”. The “Search” window will appear. Enter a name, select the Search type Layer (if you wish to run the search against a layer) or Locator (if you wish to run it against a specific Geocode service) then enter placeholder for the search. Below outlines options available for Layer and Locator Search options.
Query Layer Search
If a query layer was selected as the search type, the following layer details needs to be configured:
Search Name

- Service: Existing service URL’s can be selected in the drop-down menu. This is the feature service layer from which the search is performed on. Multiple fields in the feature service can then be selected.
- Layer picker: can be used to search against your content, organisation or ArcGIS online content.
- Display Field: From the fields selected when the service was added, the display field is what will be displayed.
- Search Fields: Select multiple fields to search against.
Click Next to configure search behaviour.
Search Behaviour
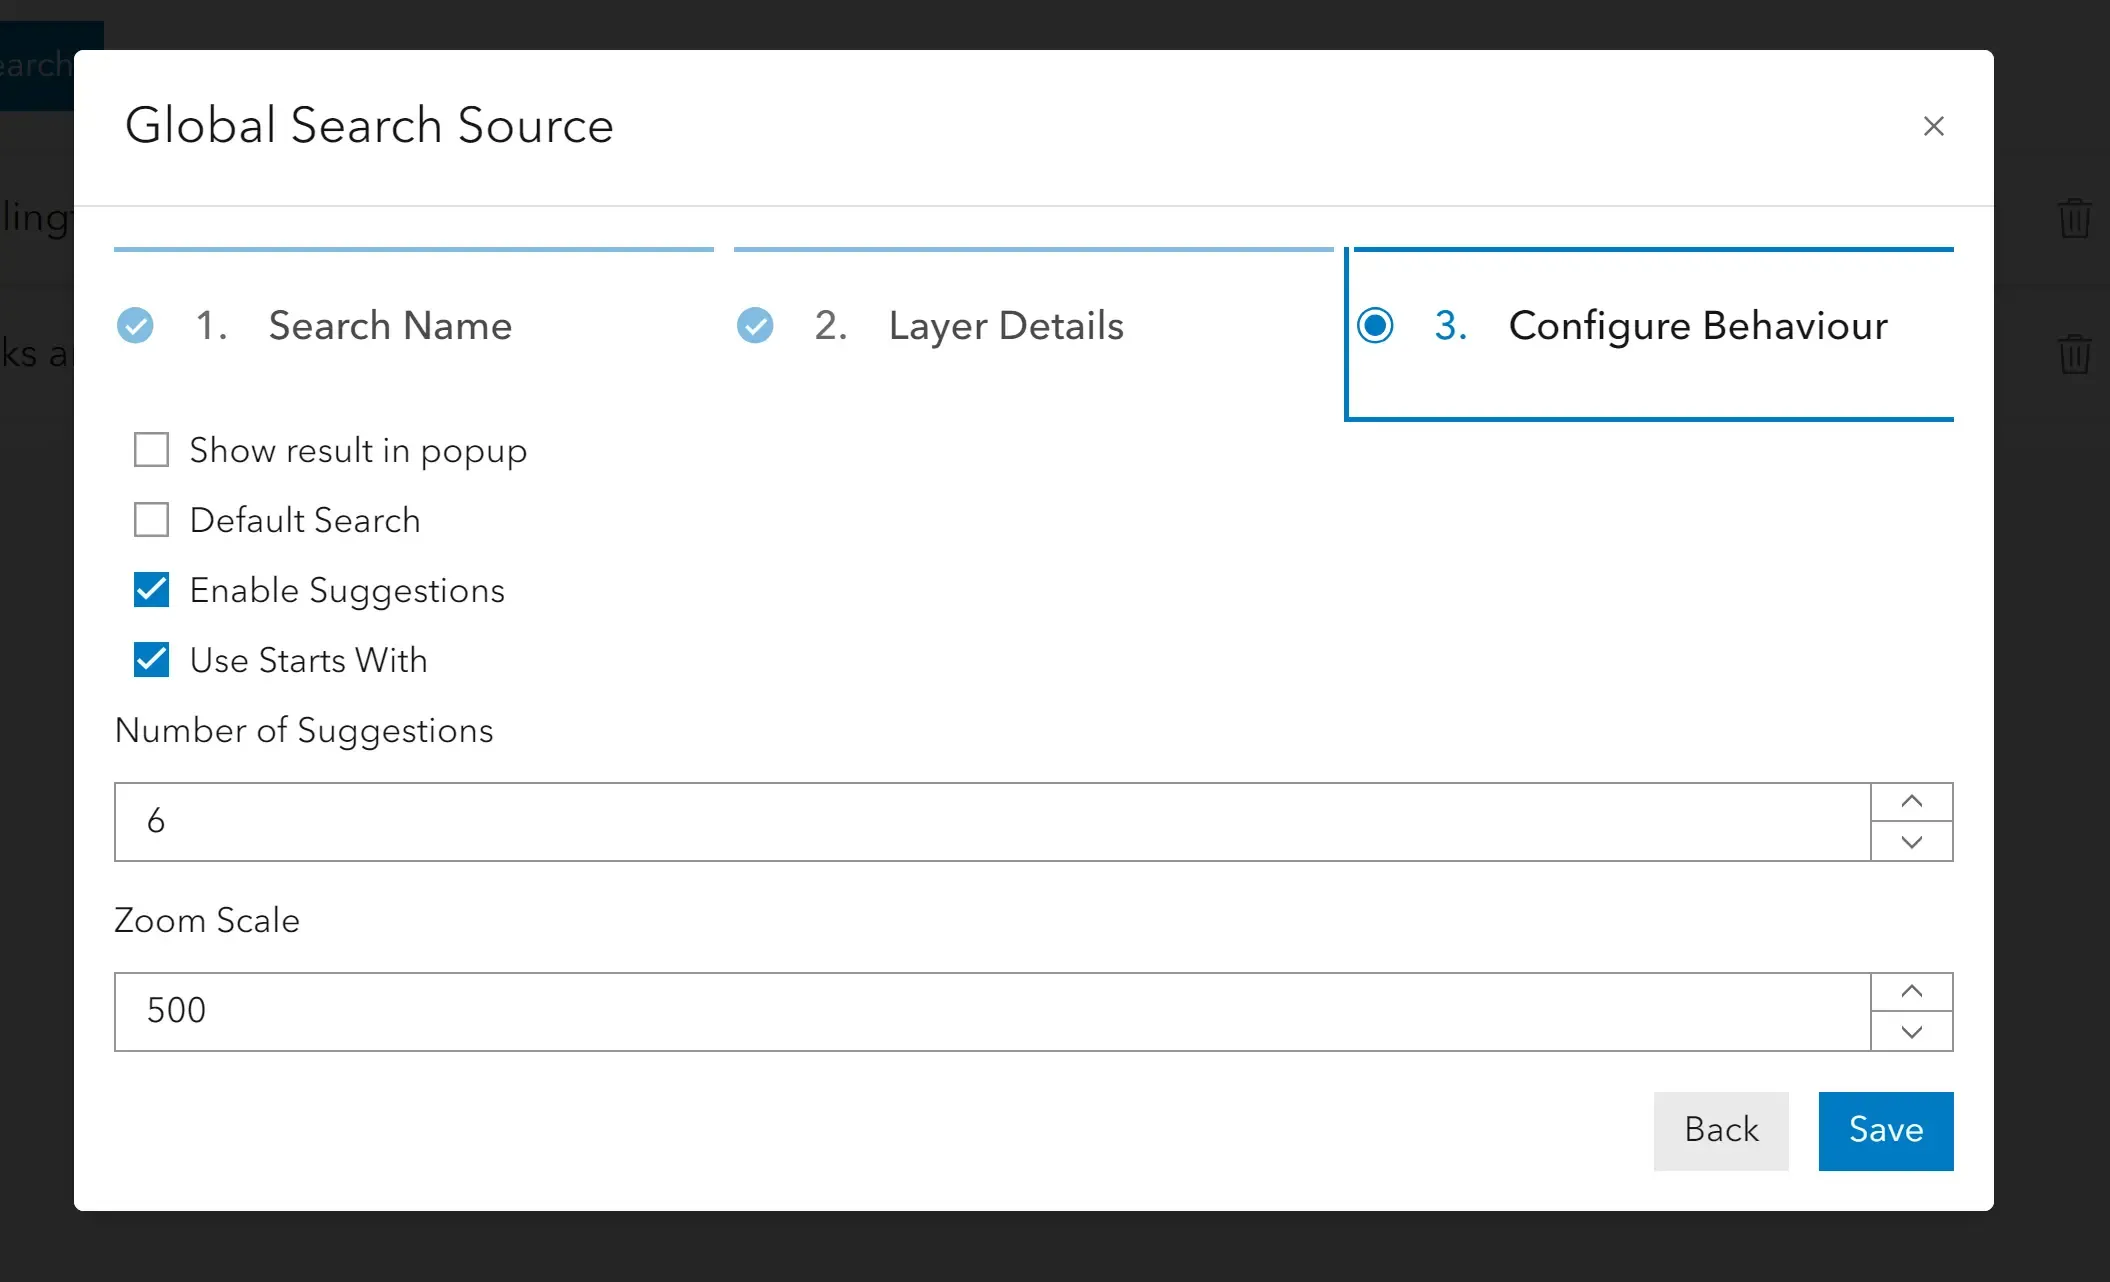
- Show in popup: Determines whether search results should appear in Popup / Popup panel
- Default Search: Adds the search to the default searches. These can be bulk applied to a map in the maps tab
- Enable Suggestions: Allows the user to determine if a list of suggestions is produced when the search bar is being populated.
- Use Starts With: Finds the results that start with the given search term
- Zoom Scale: Default scale when the search is being run against a point service.
Locator Search
If a locator was selected as the search type, the following details needs to be configured:
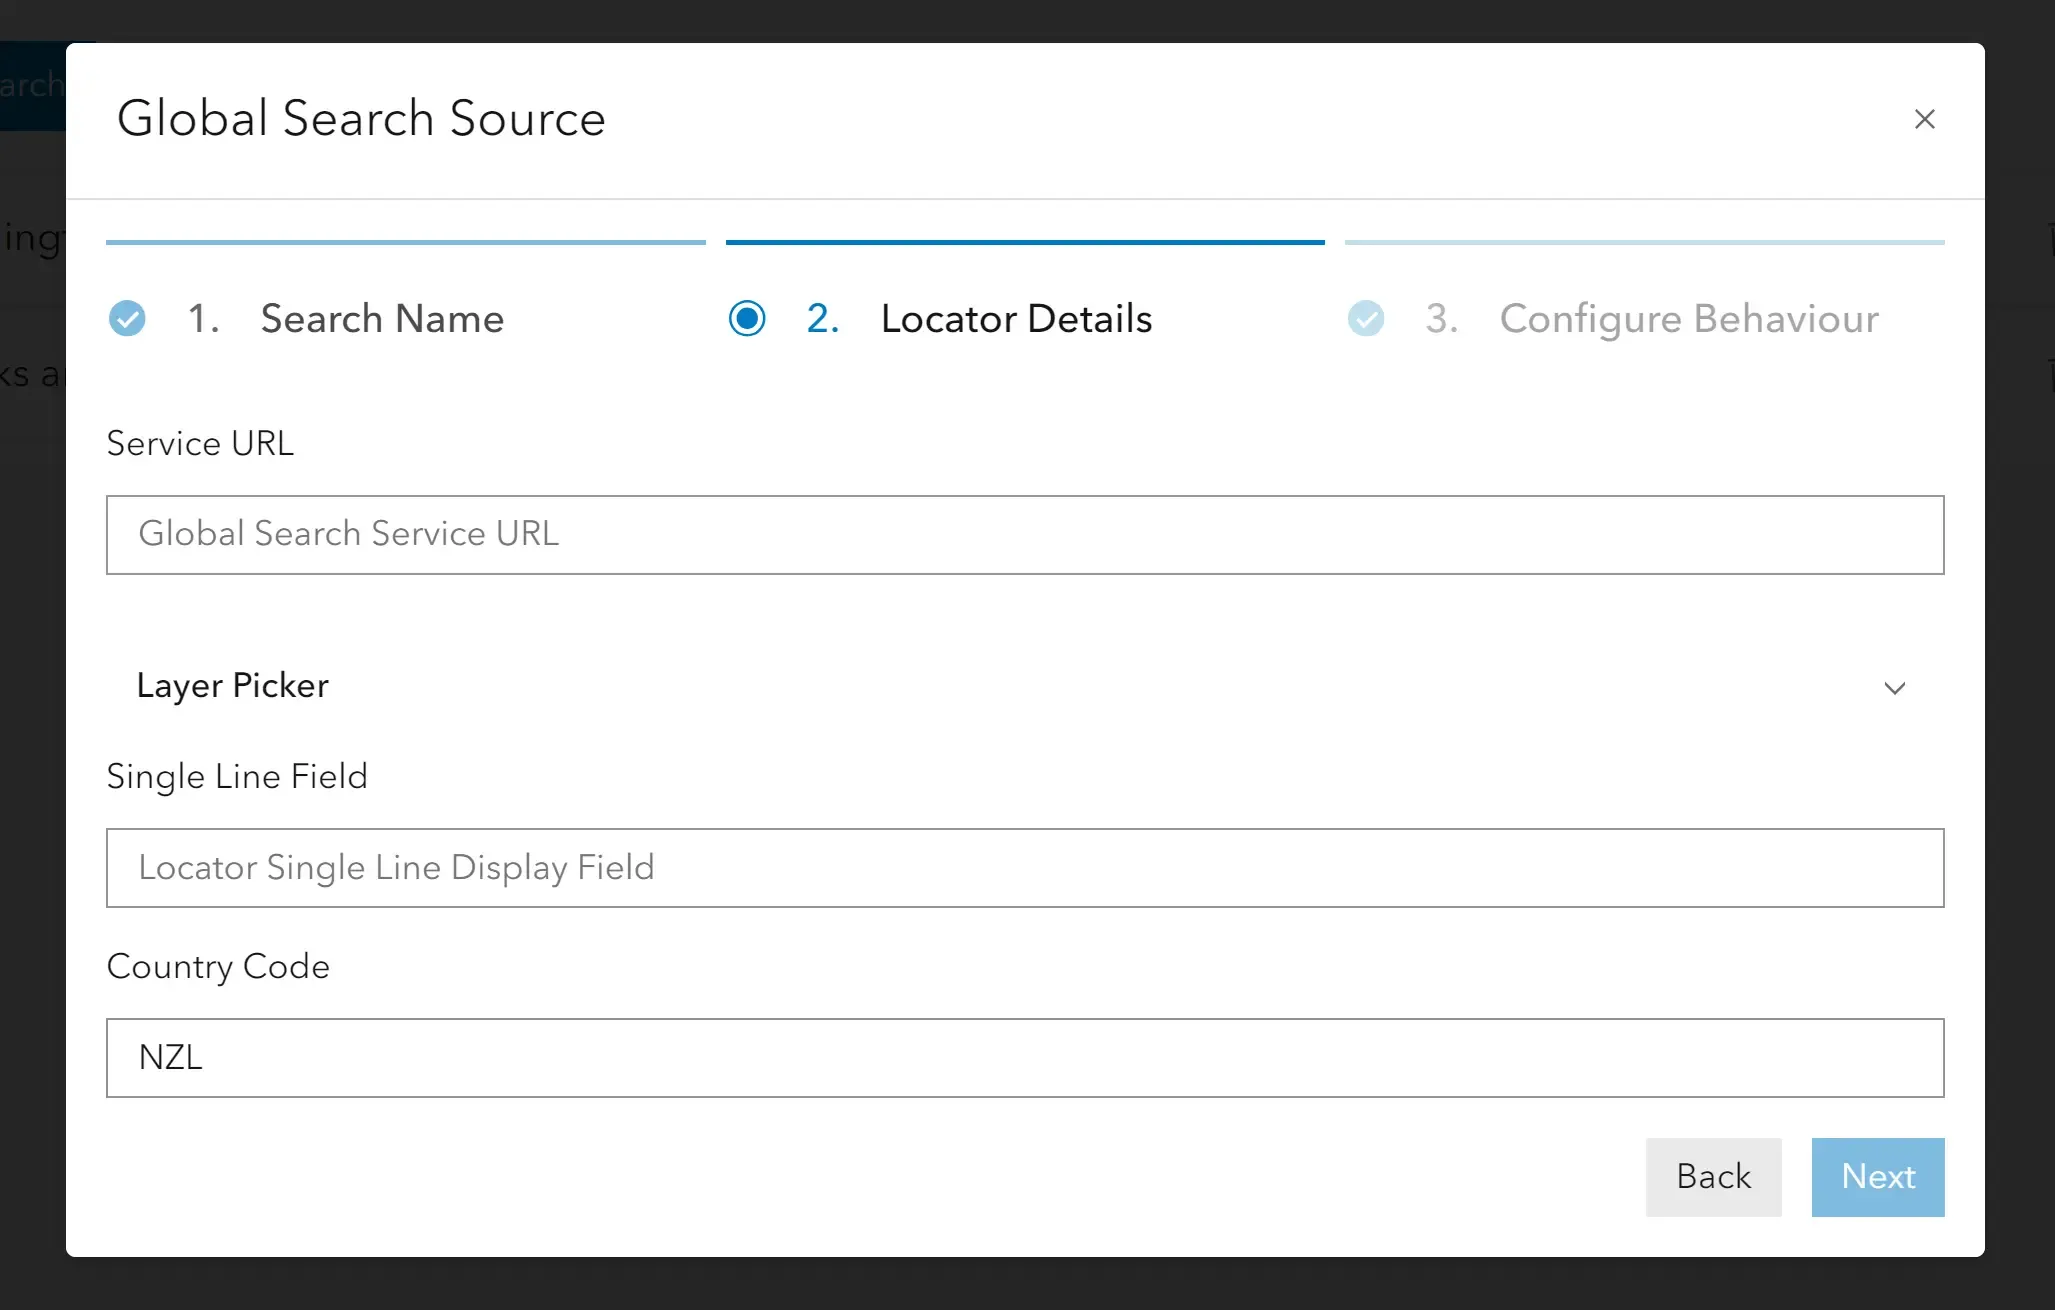
- Locator Service: An existing Geocoder URL can be selected in the drop-down menu.
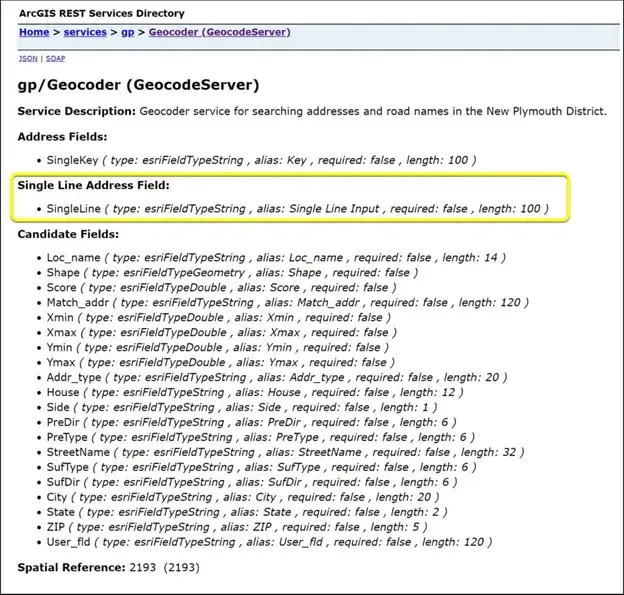
- Single Line Field: The Geocoder single line address field.
- Country code: The Geocoder country code.
You can find the single Line Field by heading to the REST URL for your locator. This will outline what field is to be used as your single-line address.
Click continue to configure search behavior (same as the Query Layer search section) then click “Finish” to add the new Locator search source.
Assign to a map
After a search source has been configured this can be assigned to a specific webmap. To do this, head to the Maps and Apps section. Under the Search tab for each viewer set the following details to assign a search:
1. Placeholder: The placeholder text in the viewer search bar.
2. Use Check-boxes: enables the option to have the assigned searches listed as checkboxes in the viewer. The user can then tick on and off to filter down what is returned when they enter a search term
3. Search on Hover: Shows the location of the search suggestion when the user hovers over the term in the results dropdown.
4. Defining the Source and Adding Default Searches: The user can then define which Source to use from the drop-down and then click Add. Searches that had the Default Search ticked during configuration can be bulk added to a map by clicking Add Default.
Edit / Delete a Search Source
To edit an existing search source, click on the Edit in the row of the search source. The search source window will appear where search details can be edited and then saved. Similarly, to delete a search click Delete in the row of the search source. The search source will be removed from the table and can no longer be selected by any search bars.
