Configuring the Gallery
This guide will take you through the steps to configure the LocalMaps Gallery in the admin panel.
Organise, categorise, and share content with your users.
As an administrator of an organization, you can configure your LocalMaps Gallery to contents that are important to the organization. Content can either be general (i.e for everyone to see) or secure (i.e only for those with the correct ArcGIS credentials within your organisation). You can display the content from a dedicated Group as configured in ArcGIS Online or Portal for ArcGIS, depending on which system your LocalMaps is set up against. This group will need to be created in the ArcGIS Online or Portal and can contain web maps (that will be skinned with the LocalMaps Viewer v3.1), web applications, operations dashboards, story maps and links to documents. This main group is what all users will see and must be shared with Everyone.
See the Esri Help pages on how to create a group and share content to it.
Sharing the content through LocalMaps
The Group can then be set as your LocalMaps Group in the application settings.
Maps will appear in the Gallery and Content Group if one of two conditions is met:
- The map is in the Content Group, or
- The map has the tag inlcuding the word “LocalMaps” and the map access level is either account, organisation, private, or shared.
Categorise contents and share as needed
LocalMaps Categories make it easier for others to find content in your Gallery. They essentially allow users to filter down the maps and apps visible based on a keyword that you, the administrator define. This section allows you to configure what categories are available in the left-hand panel of the gallery page.
Create Tags for your items in ArcGIS
Categories are based on the item tags you create in ArcGIS Online or Portal for ArcGIS. What this means is that for a Map to appear in a Category you set, the item in ArcGIS Online or Portal for ArcGIS must also have that Category name entered as a Tag e.g. Property, Public, Internal, Transport etc. Here is information on how to configure Tags see Esri Item Details help.
Create Categories in LocalMaps
- To add a category in LocalMaps login as Administrator.
- Under the Gallery section in the administrative panel, you will see a section to add/manage categories.

- New categories can be added by clicking the + button and entering a Category name. Click OK.
- Now add the tags you have created in your ArcGIS as categories e.g. Property, Public, Internal, Transport etc.
- Categories can be reordered by clicking the six-dot button and dragging the category to a new position.
- To delete a category, click the trash can.
Refresh the Gallery page and you can now see the contents are categorised based on the tags and the categories created.
Customise based on your organisation’s brand guidelines and needs.
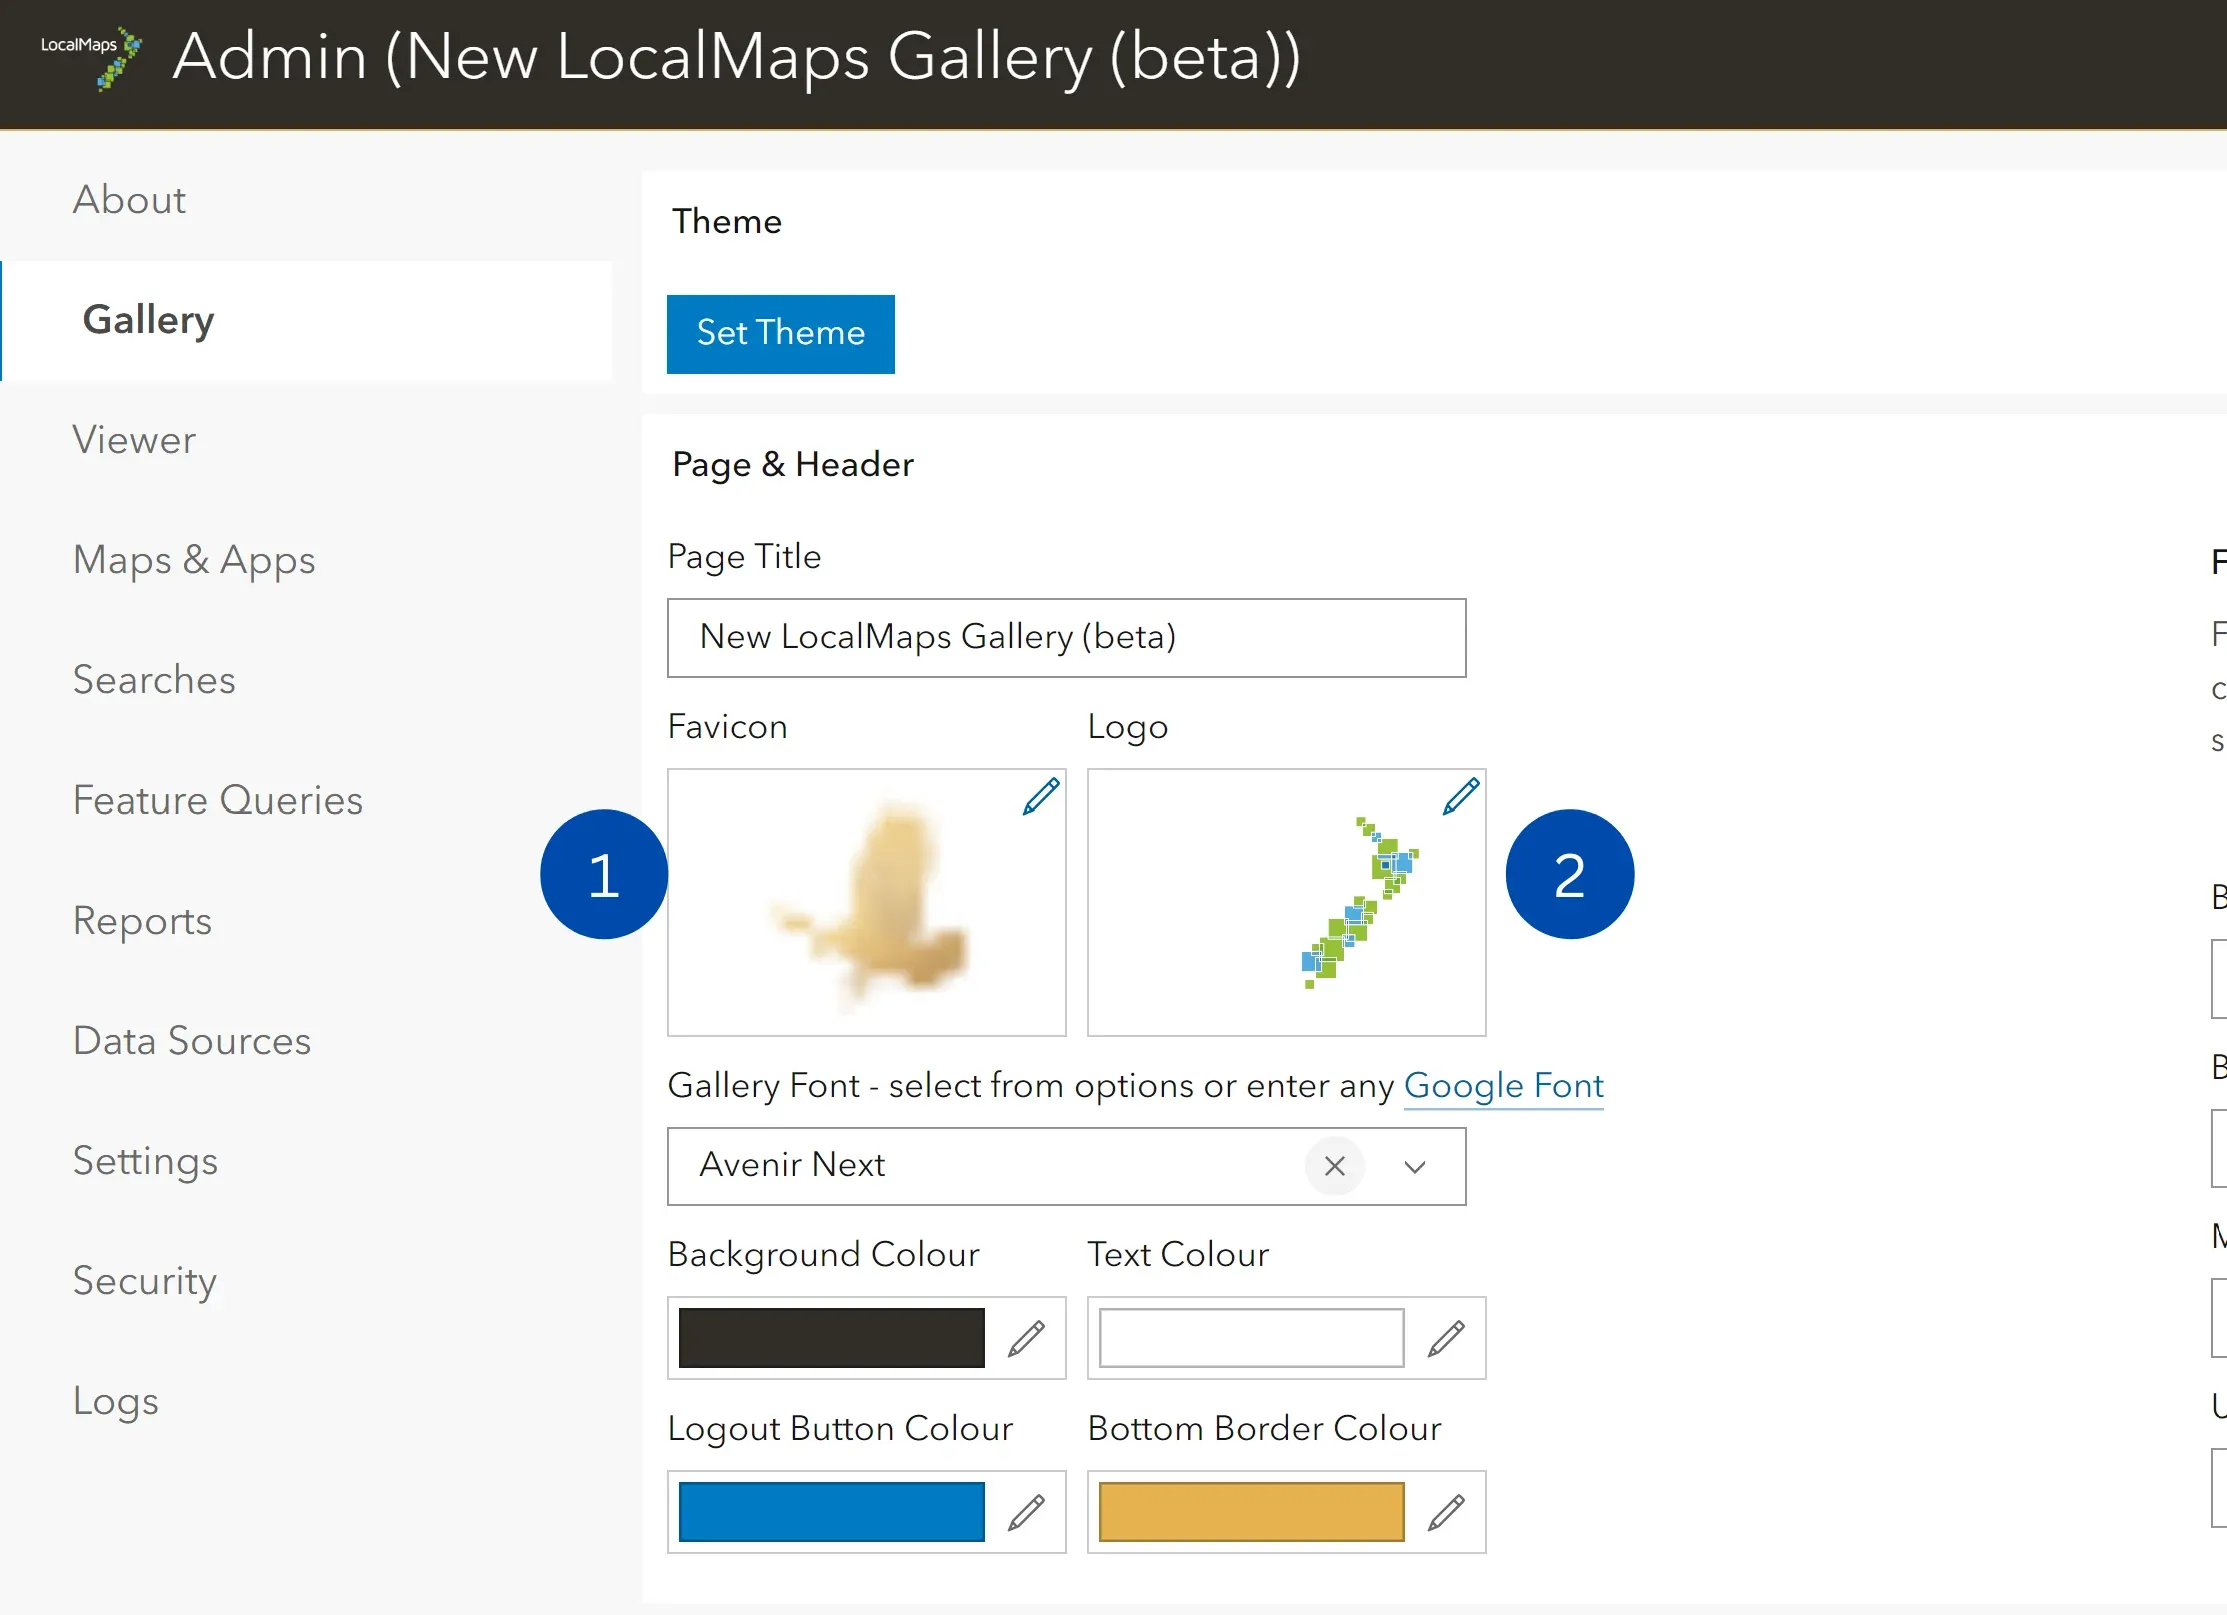
- Change the favicon by clicking on the favicon image and uploading a new image.
- Change the logo by clicking on the logo image and uploading a new image.
- Change the hero image and customise the hero banner under the Hero Header section.

Dimensions for images
For reference, these are the dimensions for the images used in the LocalMaps demo site. These are meant as a guide only, and you can adjust the dimensions to suit your needs.
- Favicon: 16px x 16px
- Gallery Logo: 600px x 425px
- Hero Heading: 2673px x 1017px
- Viewer Logo: 600px x 425px
- Loading screen: 1048px x 800px
Configure the colour, font, and background seamlessly through admin panel.
LocalMaps gives you the flexibility to customise the colour, font and background of your gallery and viewer. The options in the gallery are broken up into Page & Header, Info Banner, Gallery Content, and Footer Settings. Within each of these there are options to change background colour and font colours. Here is a quick guide to getting started:
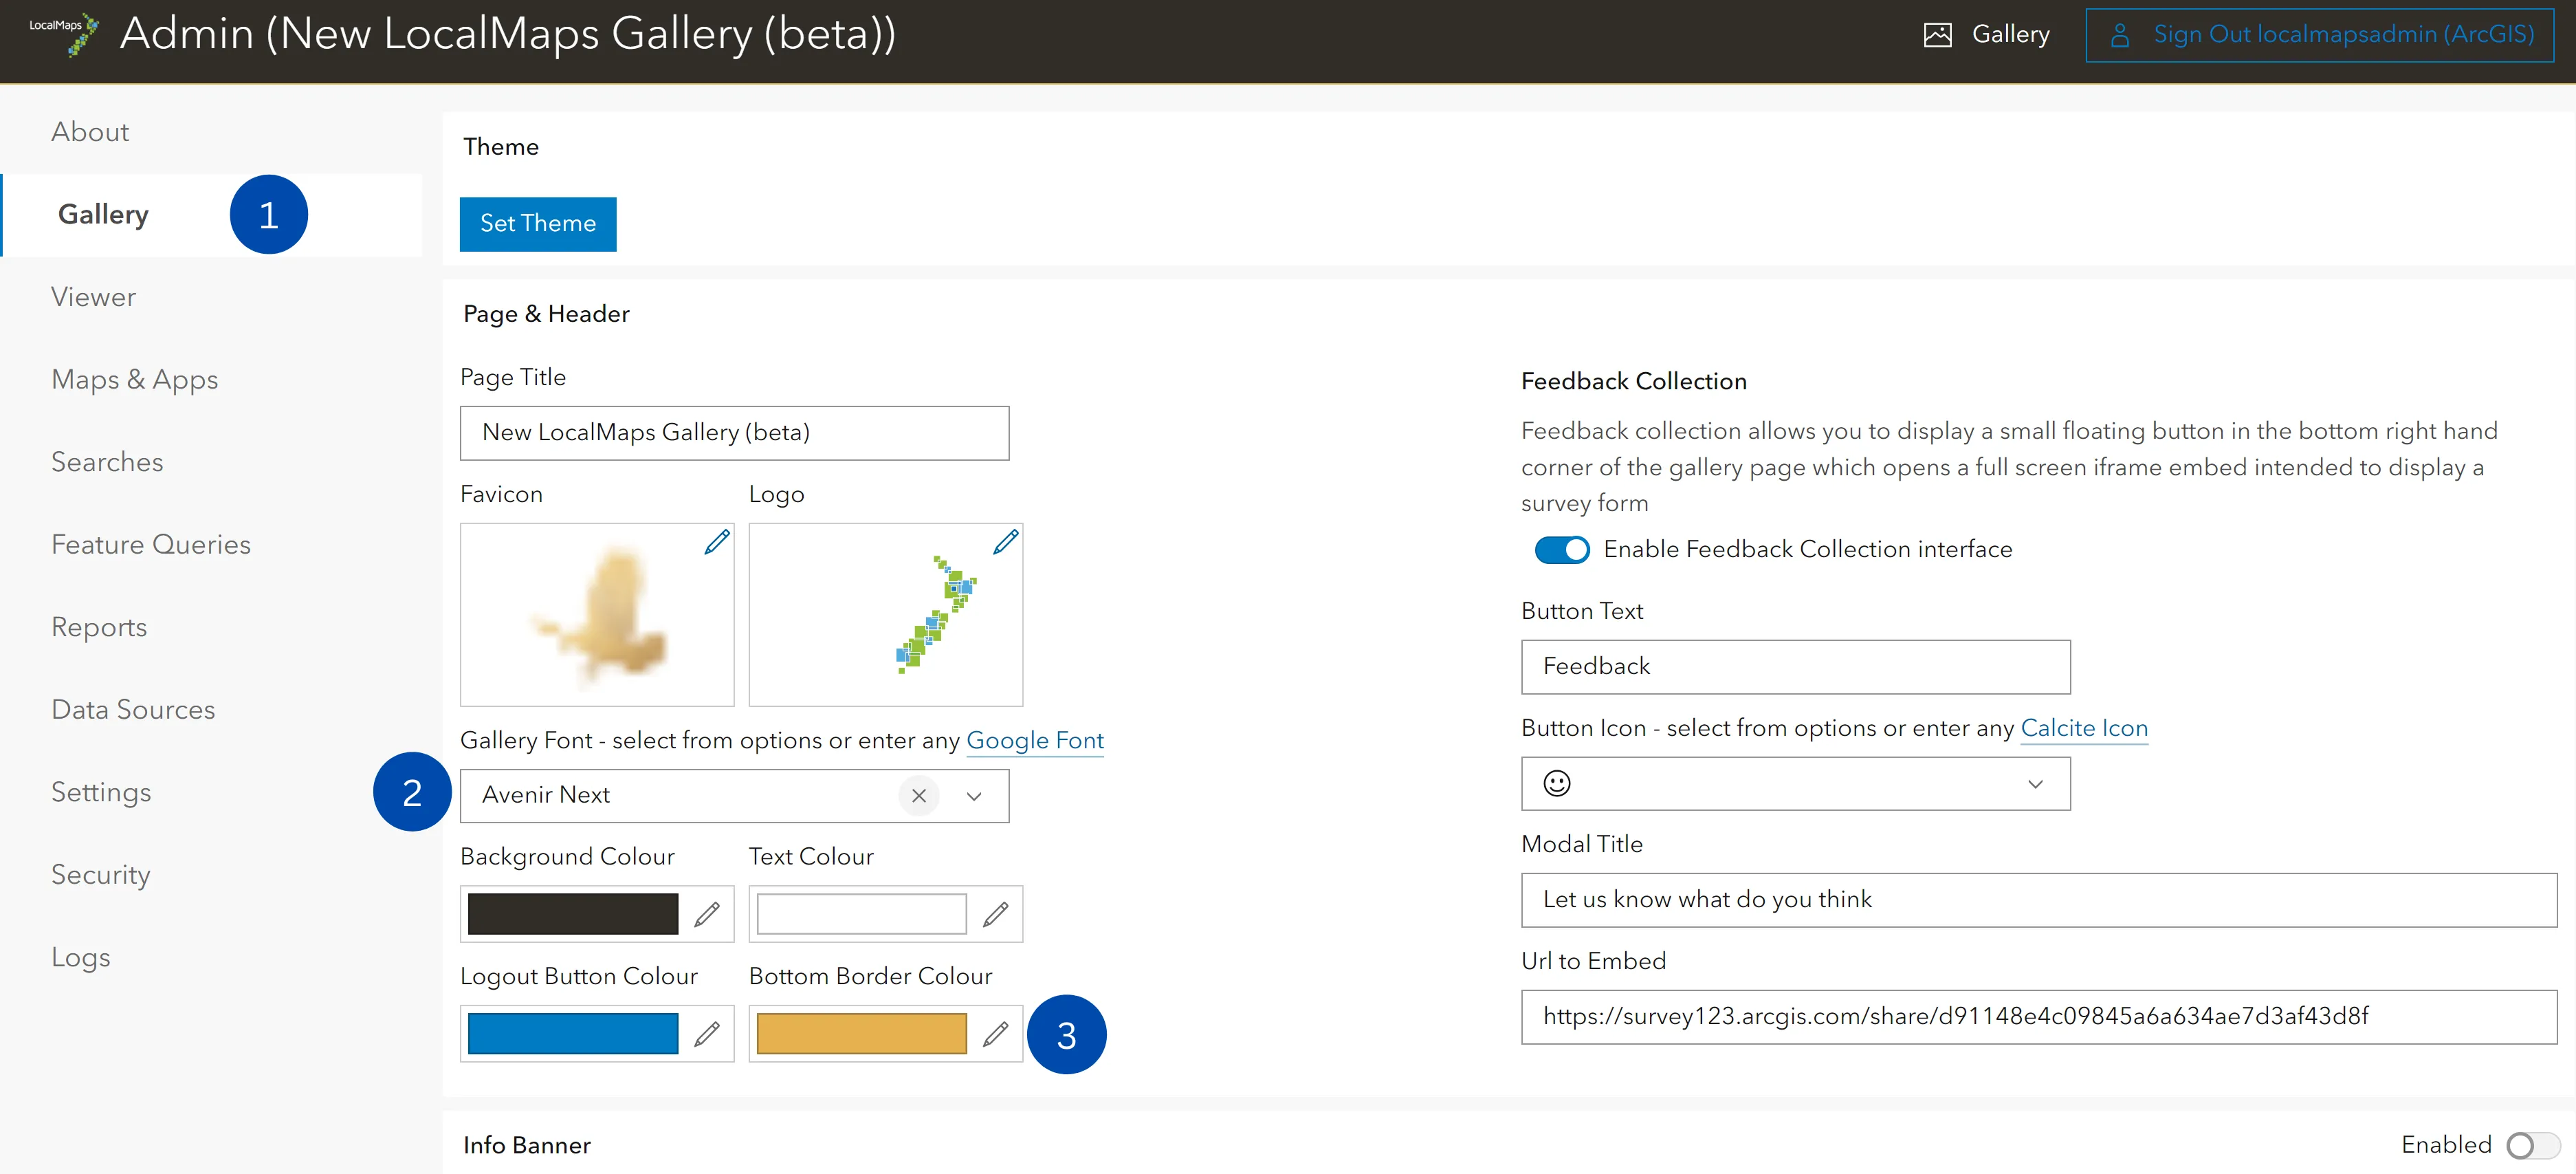
- Navigate to the admin panel and on the sidebar click on Gallery. You will be presented with a range of customisation options for each element of the page which is broken into sections
- To set the font of the gallery you have the option to select from presets of use a custom Google font. Clicking the dropdown menu will give you a list of presets to select. If you wish to use a Google font, simply type the name into the textbox and the font will be applied.
- To change colours do so by clicking on the colour field and you can either type the hex code of the colour or use the colour picker to manually choose a colour. The colour selection will be saved and applied automatically
- The same process can be applied to the Map Viewer. Clicking on viewer on the sidebar will give you the same options to choose font, background and text colour.
Add description and links to the main content page and site footer
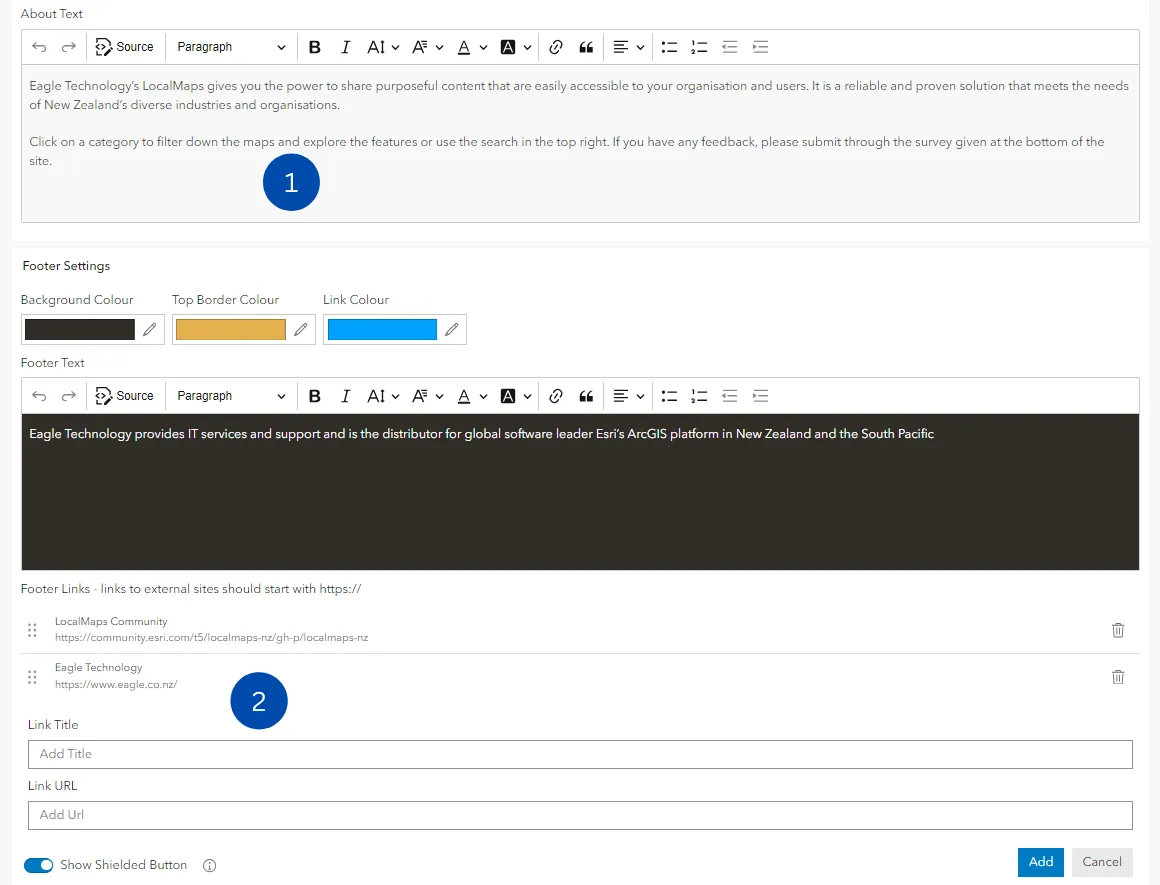
- To add a description to the main content of the page you can do so in the Gallery section in the Admin panel. Within the “Gallery Content” section there is the About Text option. You can type in your desired text and use formatting options as required. The text will automatically save and be applied to the Gallery.
- Adding links to the footer can be done by scrolling down to the “Footer Settings.” Click the button with the plus icon and it will bring up two text fields. The title of your link is the text that will be displayed on the page. Input both your title and URL into the respective text fields and then click the add button to save changes.
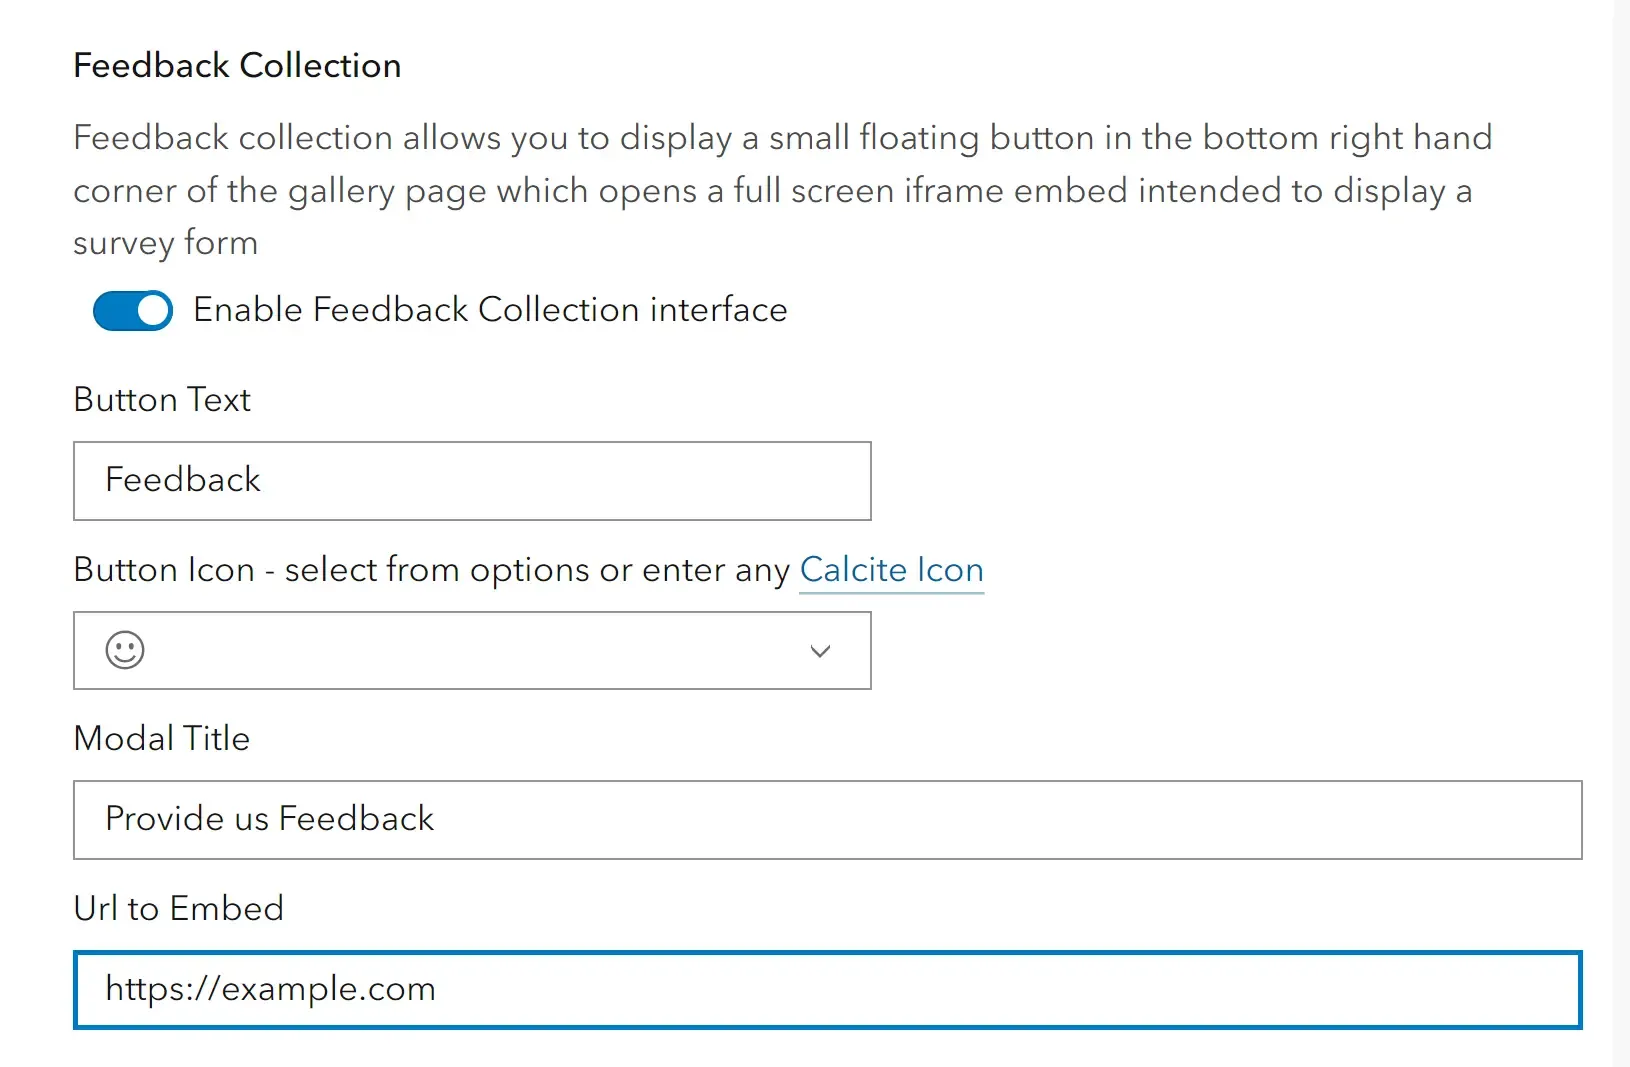
Feedback Collection
Feedback collection allows you to display a small floating button in the bottom right-hand corner of the gallery page which opens a full screen iframe embed intended to display a survey form. Please be aware that some websites have Content Security Policy (CSP) that can restrict iframes from embedding content from other domains. This can be changed by the website’s owner.
Securely share web maps to specific users.
- This is particularly useful for internal staff or contractors that may want to use the LocalMaps Gallery as a central destination to access content from your organization.
- To make secure maps available in the LocalMaps gallery, complete the following steps.
- Go to the secure maps item details page.
- Give the item the tag “LocalMaps”.
- Share it with your secure group. Now, when a member of this group logs into LocalMaps they will see general content AND the secure map that has been shared with them.
- Click the dropdown to see the Groups available in your organisation
- Select a group
- To view Group information, click View Group Page
Display eye-catching announcements or alerts through the notification banner.
The information banner can be used to alert your users about your LocalMaps site status such as reminders, best practices, updates, company policies, schedules and more. Information banners display at the top of your LocalMaps site and are viewable to all users accessing your site.
- The information banner can be enabled/disabled by clicking the toggle.
- You can set the background colour of the information banner using the colour picker, as well as set the text colour
- Type your text that you wish to be displayed into the text field
- A contrast ratio of at least 4.5 is required to pass accessibility standards. The ratio will update as you change colours to ensure you meet standards before publishing.

Enable shielded site through the footer.
The Shielded button allows victims of domestic violence to receive help and support through your site.
- The shielded site toggle is located at the bottom of the gallery page under the footer settings subsection.

