Select Widget
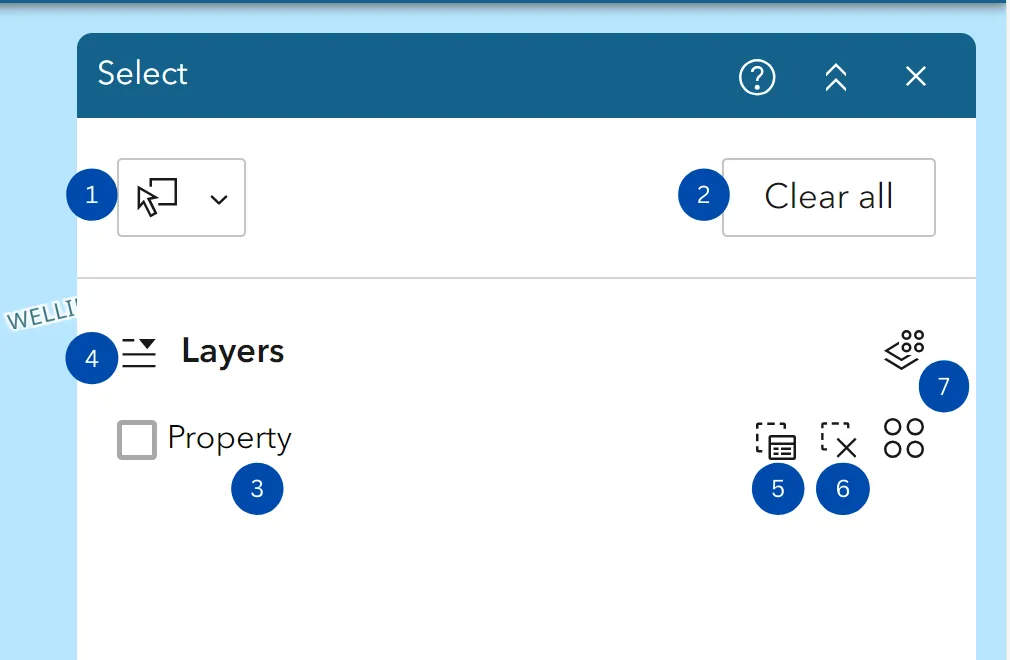
The Select Widget enables you to interactively select features on the map by drawing various shapes and lines and perform actions on the selected features (output). Given below is a snapshot of the select Widget and the full list of actions available to use, along with the instructions to use them

-
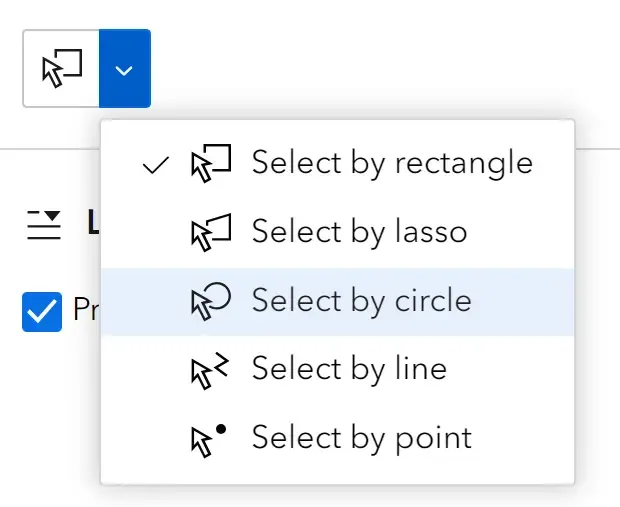
Select tool turn on/off toggle: The drop-down enables you to choose how you would like to select the data in the map (e.g., by drawing a rectangle, line, circle, etc.).
-
Clear All: Clears all selections.
-
Layers: Shows the available layers to select from that are present on the map.
-
Layer selection options: All Selectable, None Selectable, Toggle All.
-
Attribute selection: Enables you to apply filters based on SQL query based clauses.
-
Clear selection: Clears selection for the current layer.
-
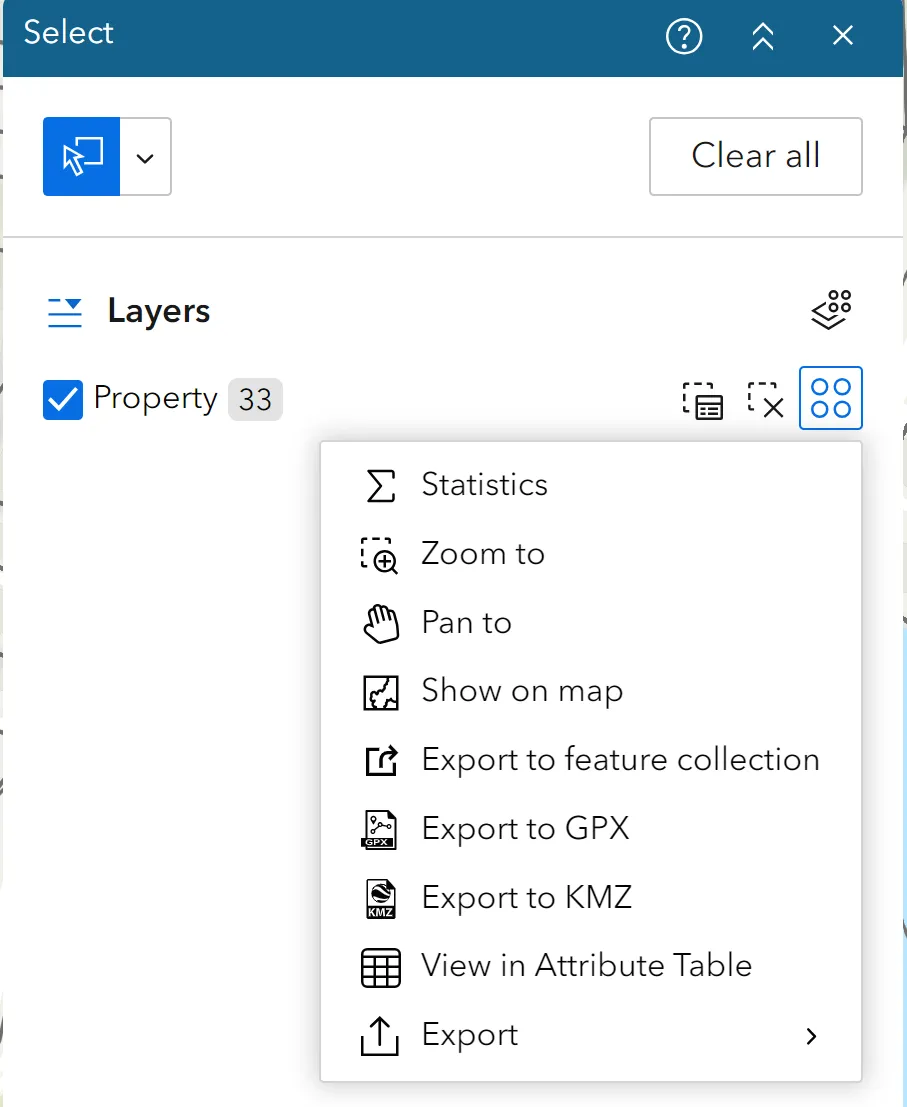
Actions Menu: This will be enabled only when a layer is selected. The selection actions include the following:
- Statistics: Not available for a single feature. It only summarizes the field with numeric type.
- Zoom to: The default.
- Pan to: The default. Pan the map to selected features.
- Show on Map: Highlights the selected features.
- Export to Feature Collection: Export selected features to a features collection.
- Export to GPX file.
- Export to KMZ file.
- View in Attribute Table: Shows selected features records in Attribute Table.
- Export to JSON
- Export to CSV
- Export to GeoJSON
- Export to Item
How to Use the Select Widget
-
Click the Select Widget to open the select pop-up window.
-
Choose any layer or the layers you want by checking the box.

-
Click on the select tool to turn it on (Blue means selection is enabled). By default, the rectangle selection tool is enabled to use. To change to another shape, click the arrow next to the Select button. To toggle the Select tool, click the Select icon.

-
Click and/or drag the pointer on the map area to select the features within it.
-
Once you have selected, the features within the selections are highlighted and the total number of features selected will be shown next to the layer name.
Peform Additional Actions
- Once a selection is made, click the Actions icon to bring up the menu (note: The actions menu will not appear if no layer is selected).

- Select the desired action.

