
Map Widgets
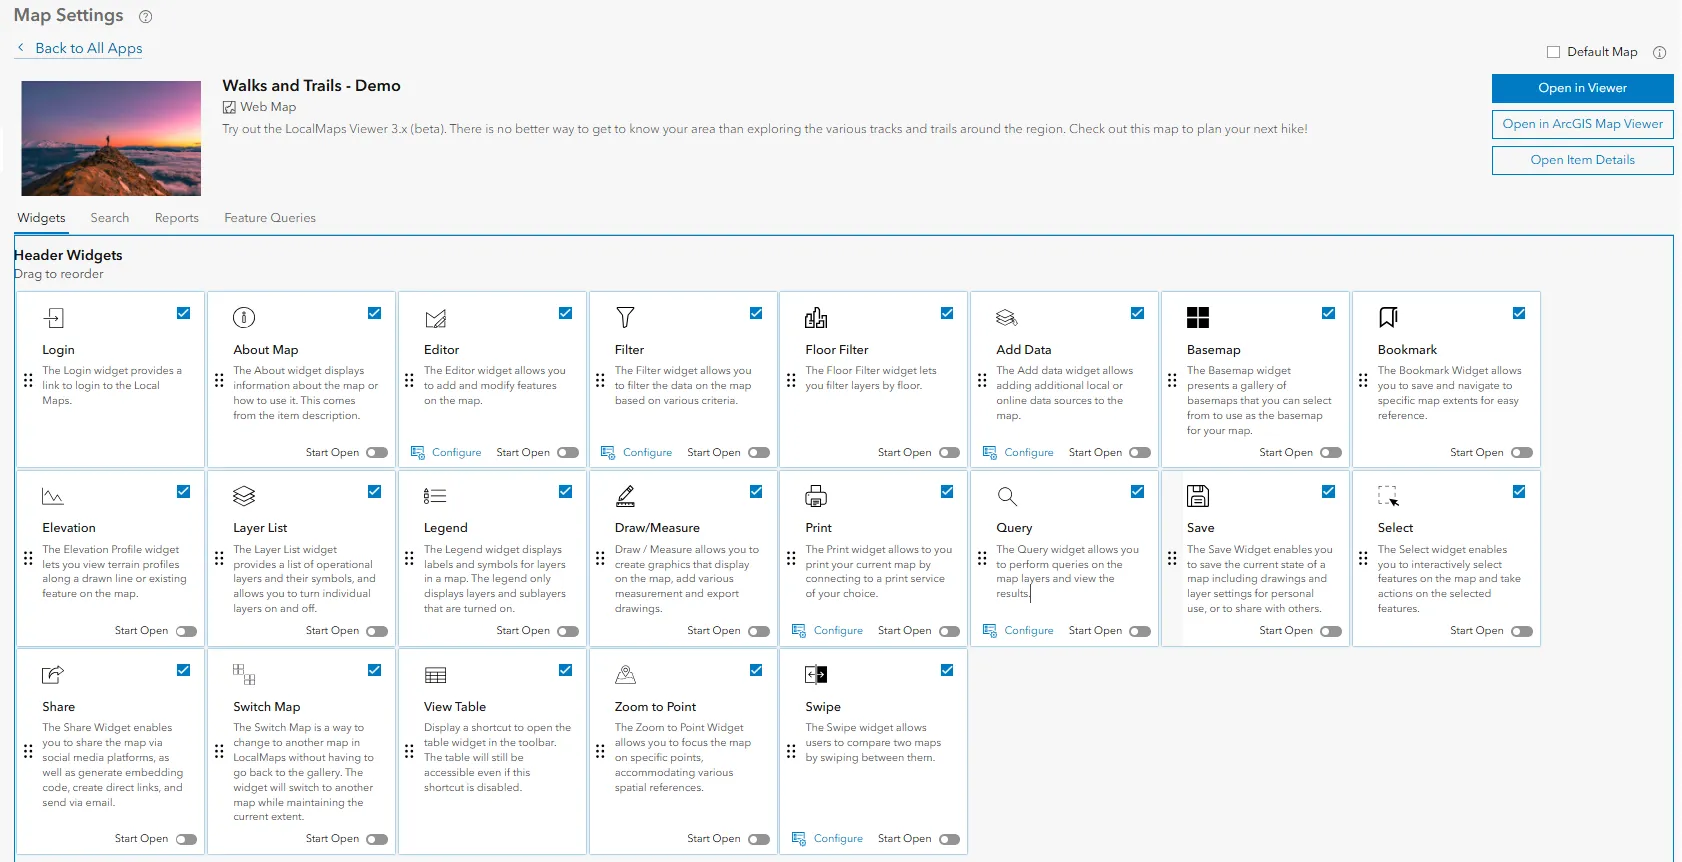
There are 17 widgets available with a base LocalMaps installation (see LocalMaps User Guide for details on each). This section allows you to configure which widgets should and should not appear in the map. By default, all widgets are enabled for a map. To disable a widget for a specific map, simply click on the widget you wish to disable. The widget icon will turn grey. Should you wish to include the widget in the webmap again, clicking on the widget icon will enable it once more. The widget icon will appear bold again. Widgets can be dragged in order to change the order in which they appear in the map.
Configure Map Widgets
Some widgets have additional configuration options. Widgets that have additional configuration options will have a configure icon below it. Click this icon to open the configuration options for that widget, and refer below for details on each widget’s configuration options.
Print Widget
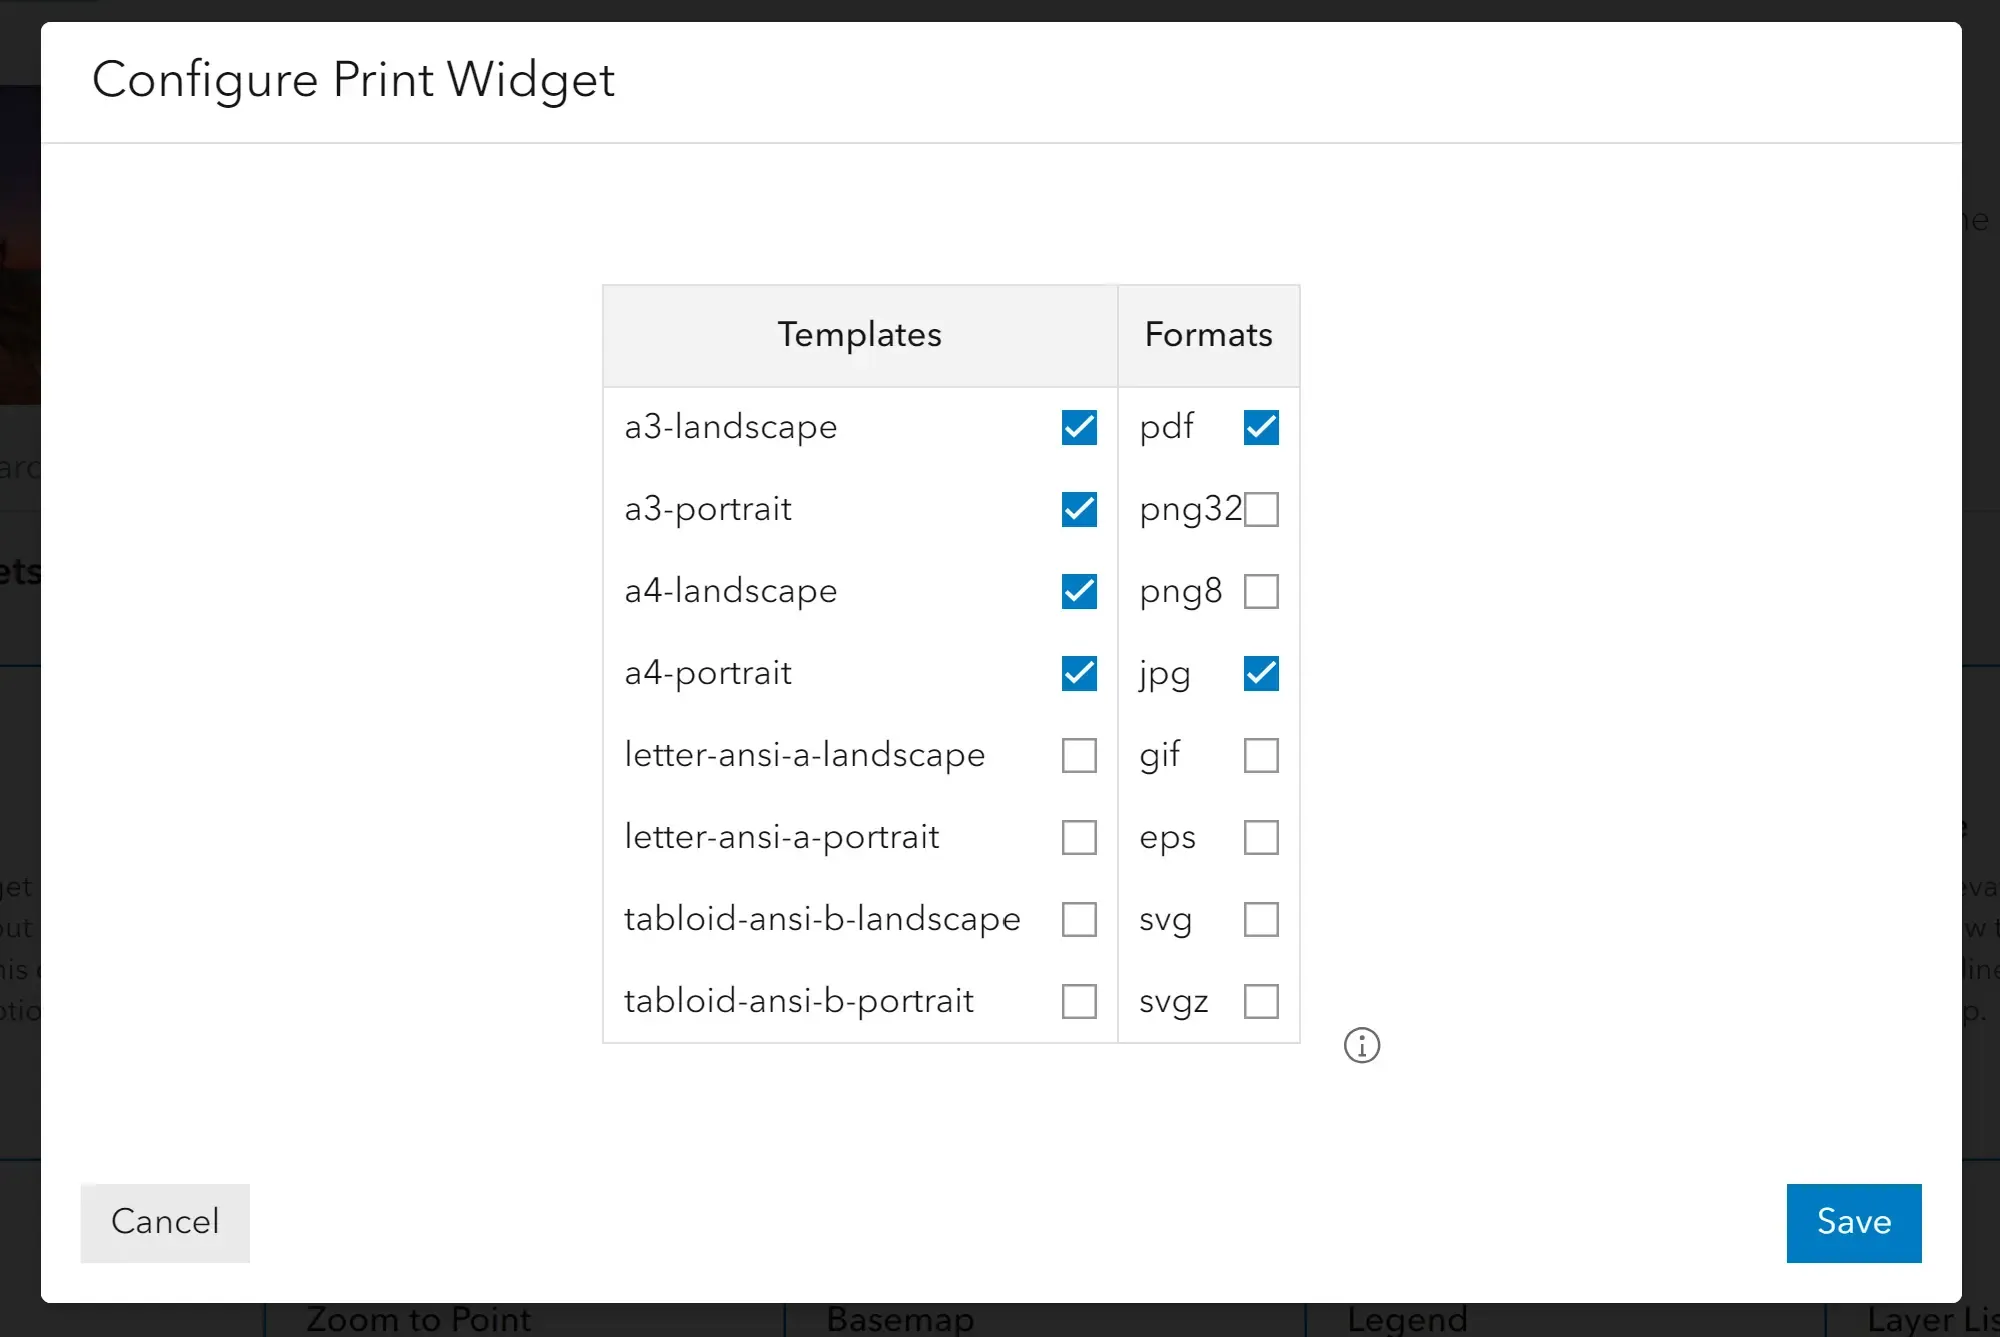
Administrators can customise the available print formats and layouts that will be available to the user in the Print Widget. Tick the boxes of the layouts and formats you wish to make available to the user. Click save to apply the changes.
Add Data Widget
Here you can set the Add Data group for the specific map. Setting the Add Data Group here will override the global Add Data Group for this map.
Swipe Widget
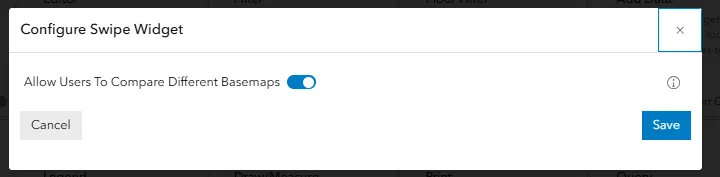
You can further choose to allow the users to compare basemaps under the configuration options.
Filter Widget
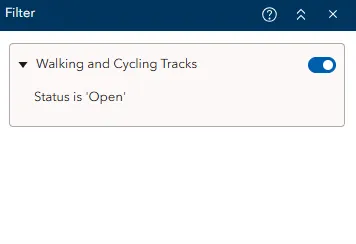
Administrators can create pre-built filters that the end users can apply to map layers. Filters are configured per layer and use simple conditions to control what data is shown on the map.
-
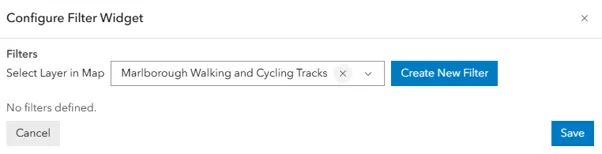
Select the map layer you want to filter and click on Create New Filter.
-
Give the filter a name.
-
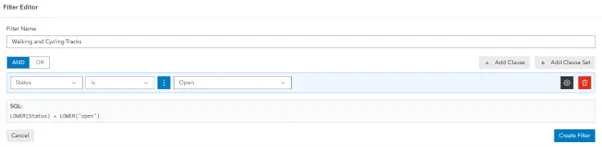
Build your filter conditions using clauses (see below). The SQL field at the bottom will display the SQL queries being created
-
Click Create Filter when done and then click Save.
 #### Building Clauses
Each clause follows the format: Field → Operator → Value
Example:
OBJECTID is 5Adding Conditions
To build more complex filters, use the following options:
- + Add Clause — Add a single condition
- + Add Clause Set — Group multiple conditions together
- AND / OR — Control how multiple clauses interact (set at the top level)
For each clause, you can specify where the value comes from:
- User Input — The user types or selects the value themselves at runtime
- Field — The value is pulled from another field in the data
Configuration Options Per Filter
Option Description Allow user to enter value Can only be enabled when User Input is selected Collapse by default Hides filter details to save space when there are many filters Ask for values Prompts the user to enter a value before the filter applies
Floor Filter Widget
This widget works only when the map contains floor-aware data. You can use this widget to support scenarios such as:
-
Providing an interactive map for exploring renderings of indoor spaces.
-
Visualise space in a large office building to help inform decisions about optimal use of floor space.
-
Locate wheelchairs, mobile defibrillators, and other critical assets in a medical facility and help staff identify the nearest available resources.
Publish a map with floor aware data and share it to the content group that is used for LocalMaps.
Edit Widget
Edit widget allow your end users to add, delete, and update features in the source data. It allows the users to edit, including move, scale, rotate geometries, and vertices editing. You can choose the fields to display, organise the fields in collapsible groups with meaningful headings, and provide instructions for editing each field. Note, to edit a feature, the layer needs to be set as editable in the web map. Please note that if the user edits, these edits are applied to the source data. The edits don’t get stored in LocalMaps. You can choose to allow Batch editing and set the initial editing mode under the configure settings.
Query Widget
Administrators can create queries that the end users can apply to map layers. Queries are configured per layer and use simple conditions to control what data is shown on the map.
- Select the map layer you want to query and click on Create New Query.
- Give the query a name.
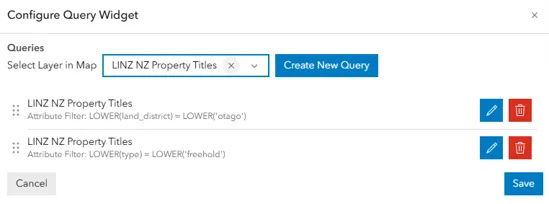
- Build your query conditions using clauses (see below).
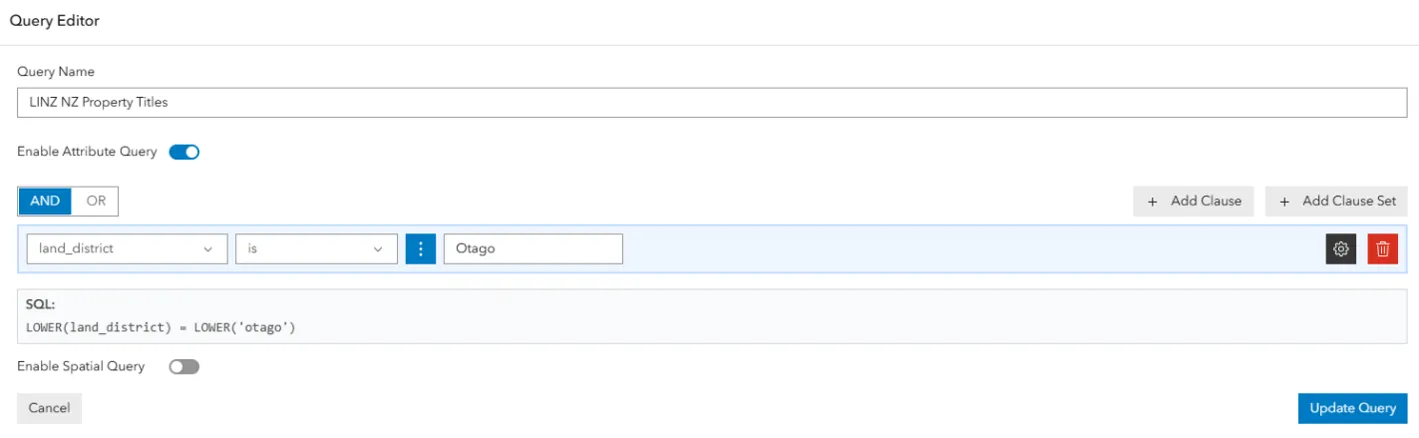
- Click Create Query when done and then click Save.
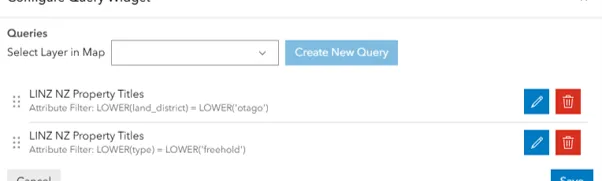 See the Filter Widget section above for details on how to build clauses and conditions.